

This article shows how three different parameters (number of steps, "CFG" or classifier-free guidance scale, and img2img strength) affect the image. These may interact with each other in complex ways, but that isn't studied here. Experiments use five different input texts (aka "prompts"): "a white parrot sitting by the sea", "full length portrait of gorgeous goddess standing in field full of flowers", "panda movie poster with yellow background and red title text", "mountains by a river" and "an ancient yellow robot holding a sword on desert". In addition they contain "prompt-engineering" terms such as "cinematic, highly detailed, illustration, concept ar". These greatly improve the results, but that topic isn't covered here either. One can find prompt examples from sites such as lexica.art and huggingface.co's MagicPrompt.
Variations of the "same" image are generated by changing the seed of a random number generator. This affects the noise from which denoising steps are started (the diffusion process), and the algorithm will converge to quite different looking images. But they should still be conseptually similar. Here three different seeds are used for each experiment.
Each parameter is varied to eight different values, either on a linear or logarithmic scale. Thus each figure consists of 3 × 8 sub-images. Originally each image was generated on a resolution of 512 × 512 (except the panda poster, since it has a different aspect ratio), so the resulting image tile would have a resolution of 1536 × 4096, and there are 20 such images in total. This brings the total image size to 156 megapixels, which would make the file size relatively large. Original PNGs take 180 MB, but the used images here have a resolution of 2560 × 960, and with a JPG quality of 90% their total size is only 12 MB (93% less).
The default settings are 50 denoising steps, CFG scale of 7.5 and reference image strength of 0 (meaning no reference image). All other parameters are kept constant while one other parameter is varied. (Note: the commmon convention on img2img applications seems to specify the weight of the added random noise, not the weight of the input image! Here the "image strength" is 1 - "noise strength".) The results shown here are based on Stable Diffusion model version 1.4 and using the "DDIM" sampler.
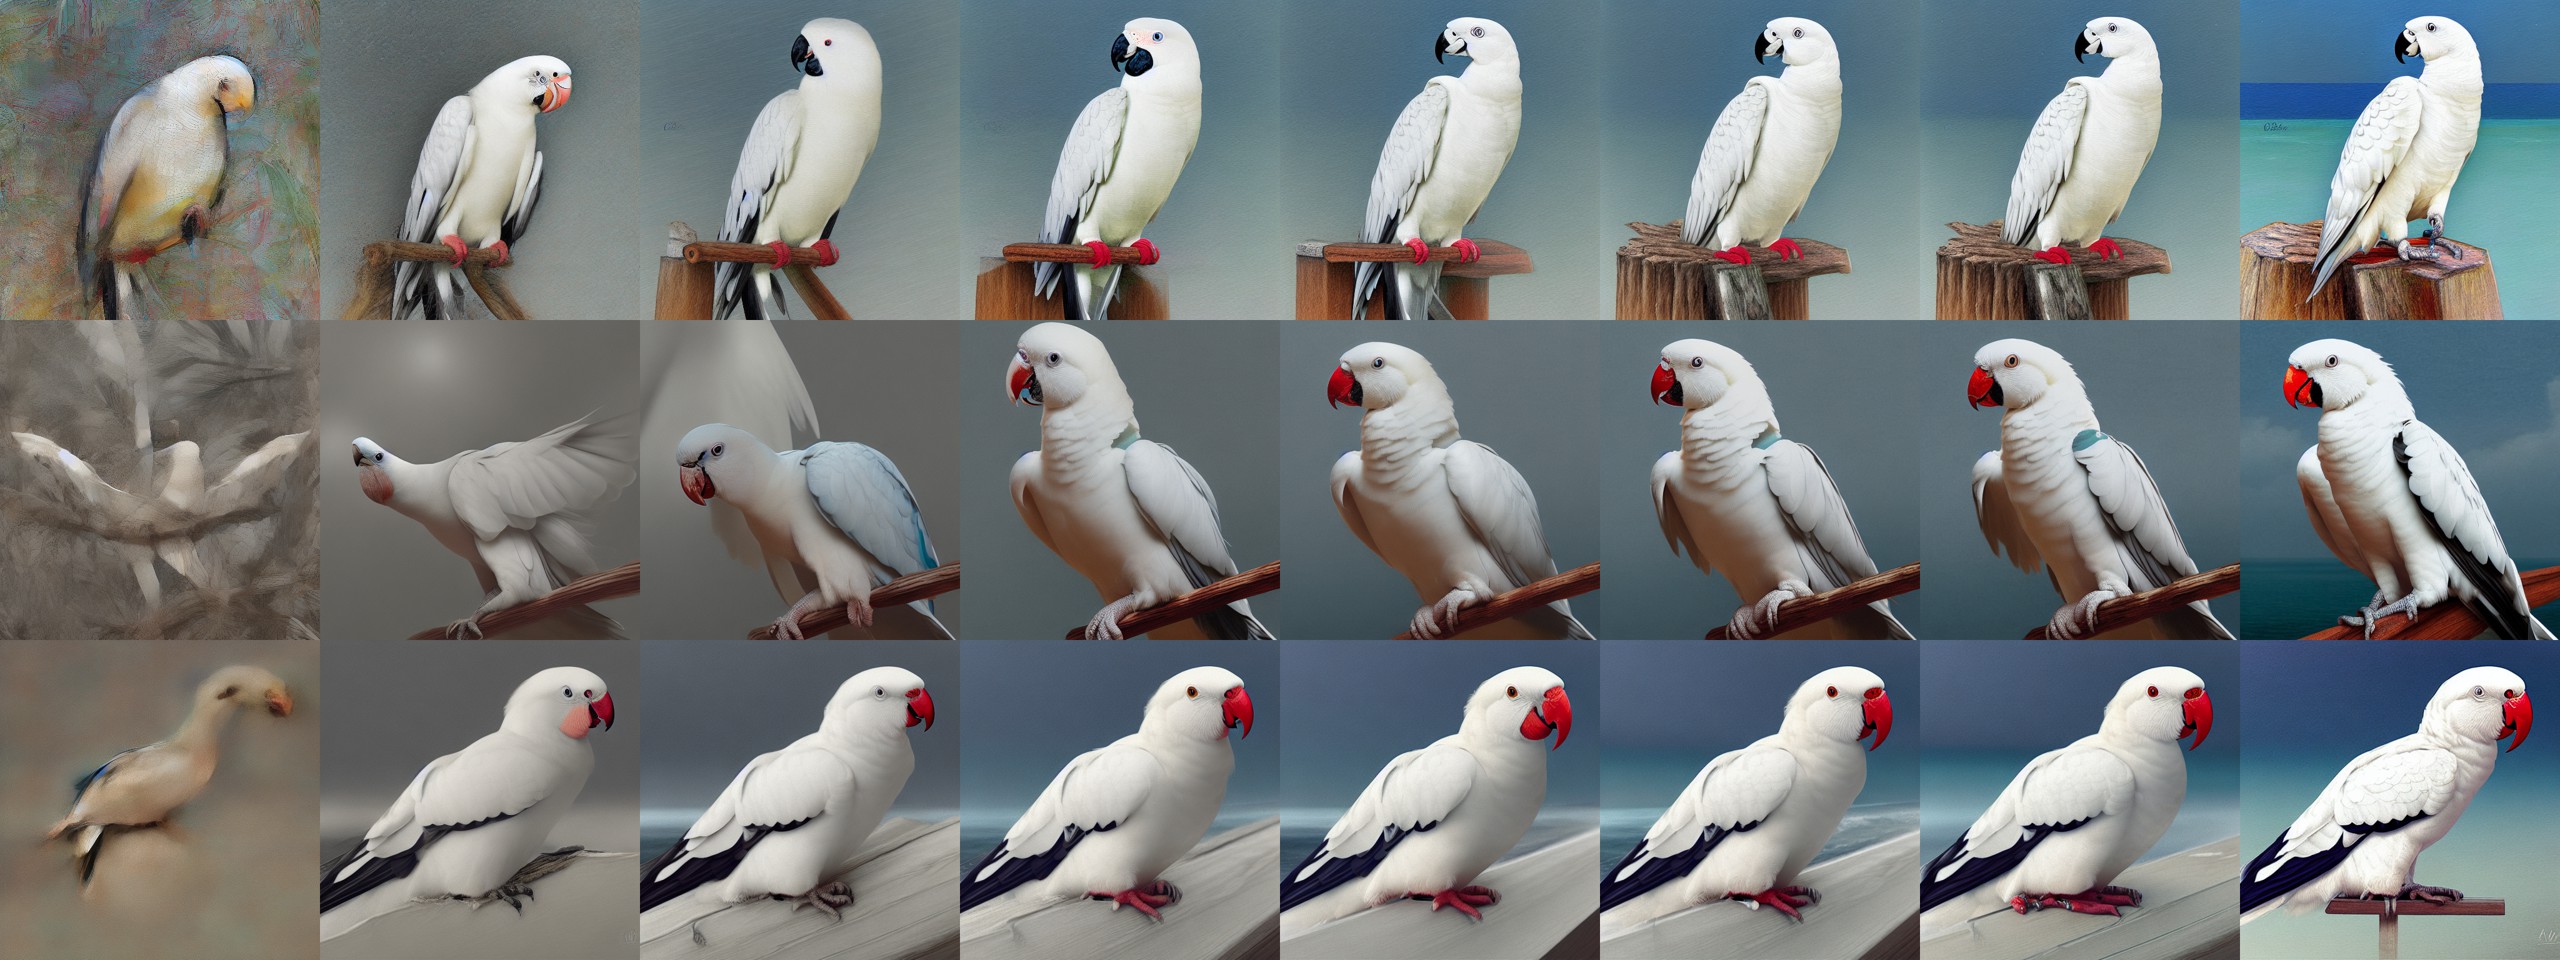
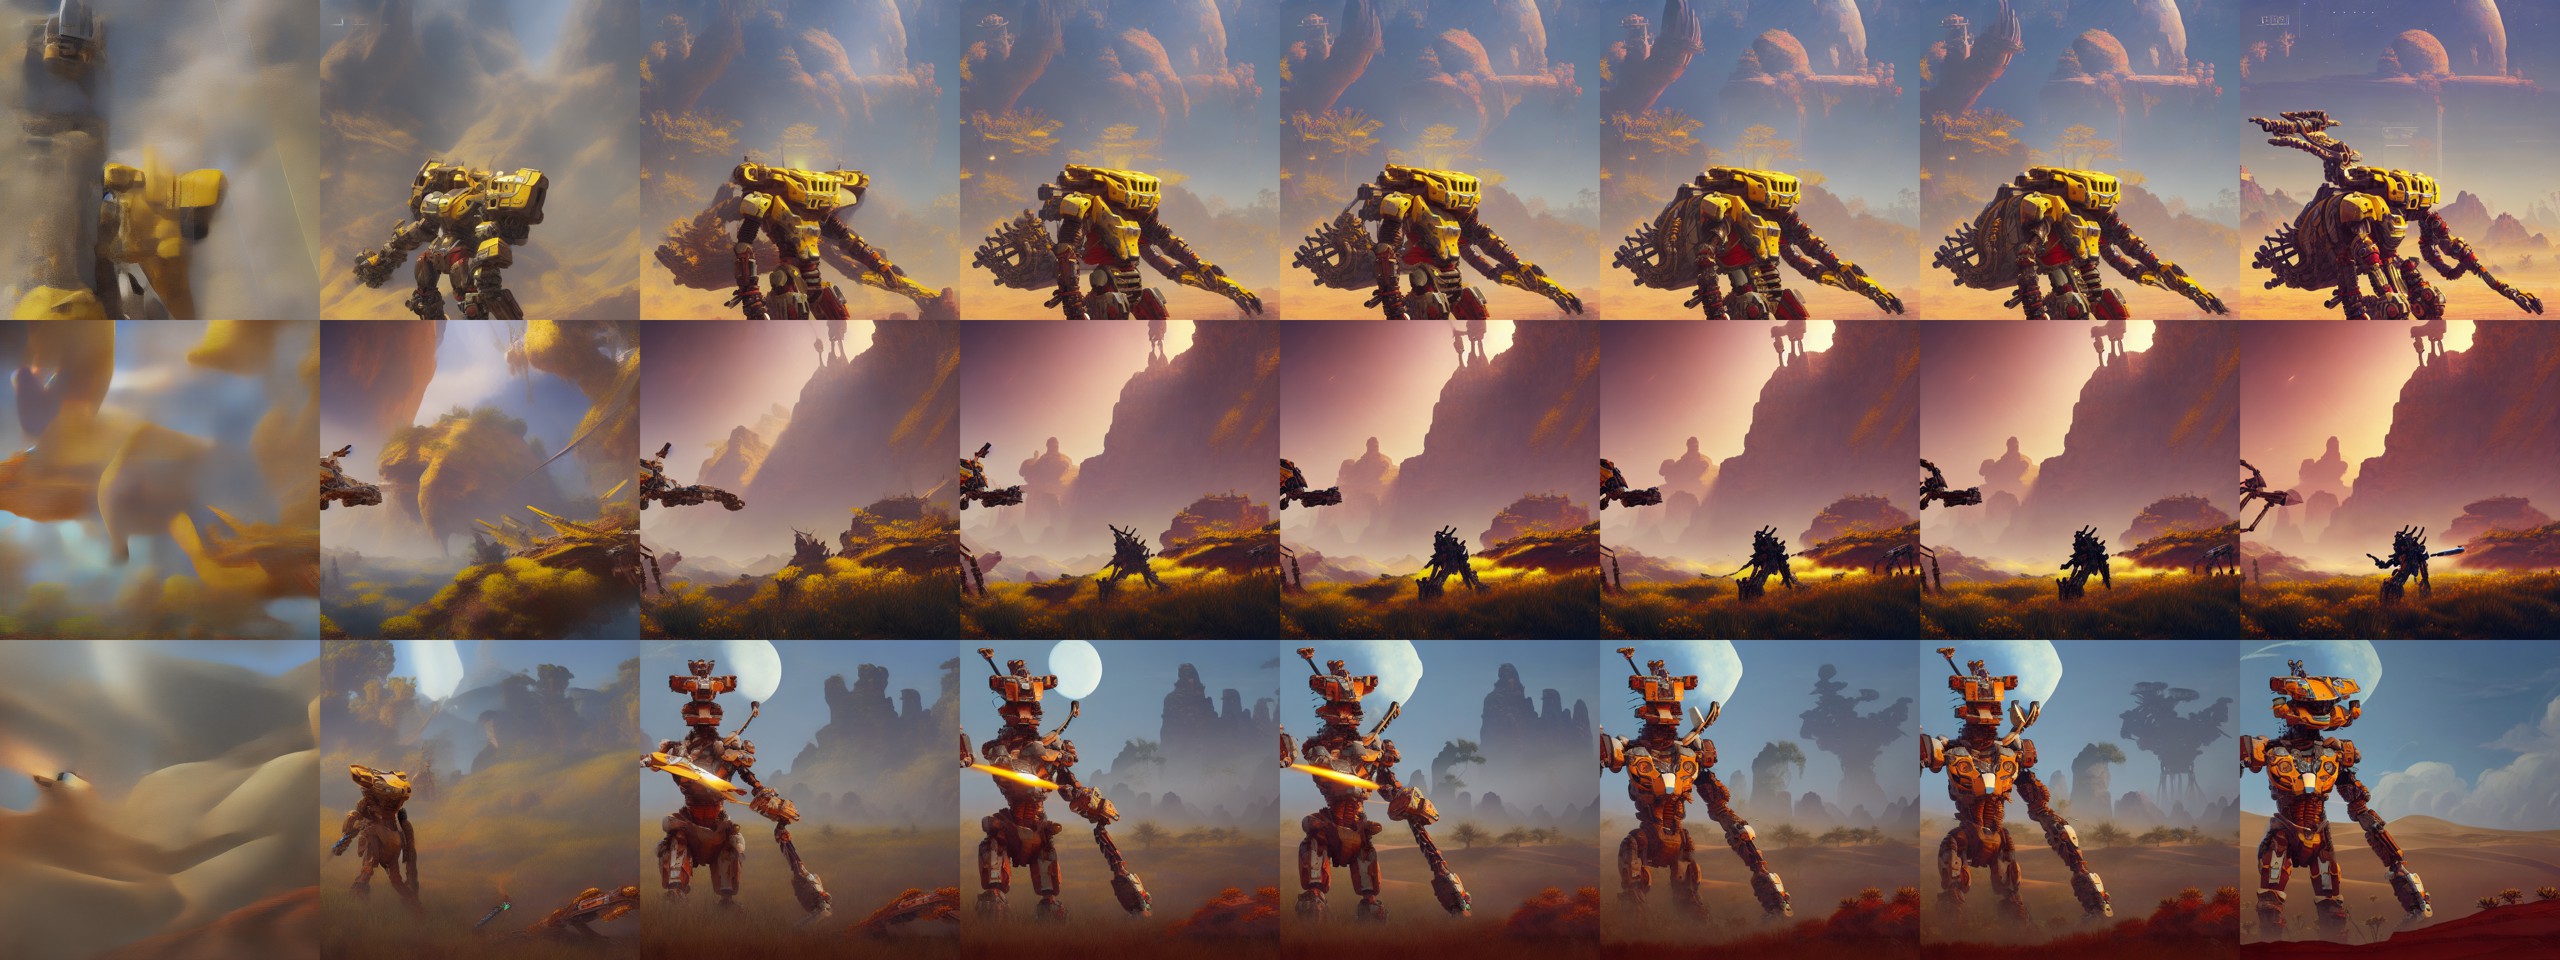
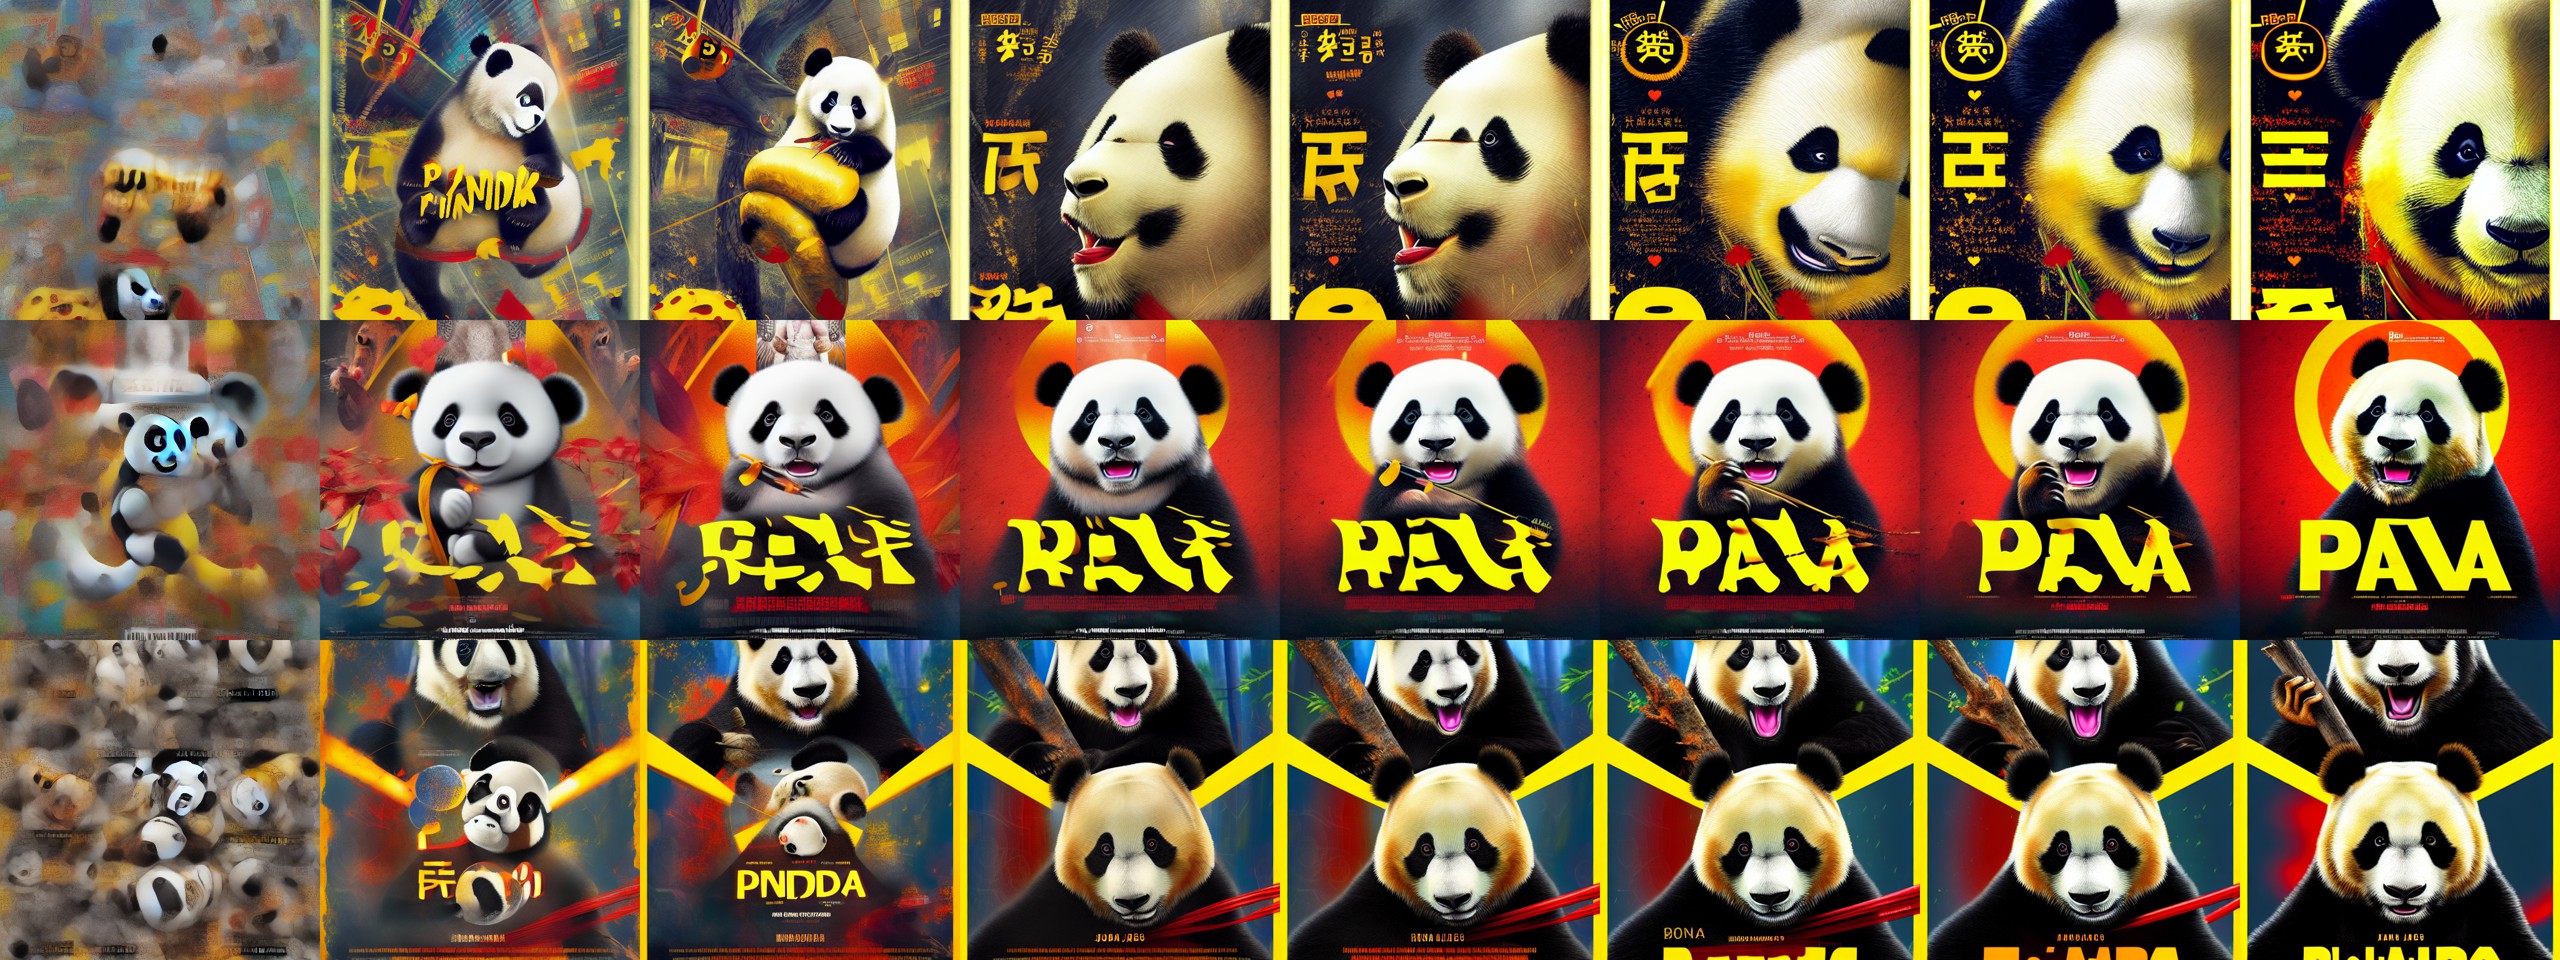
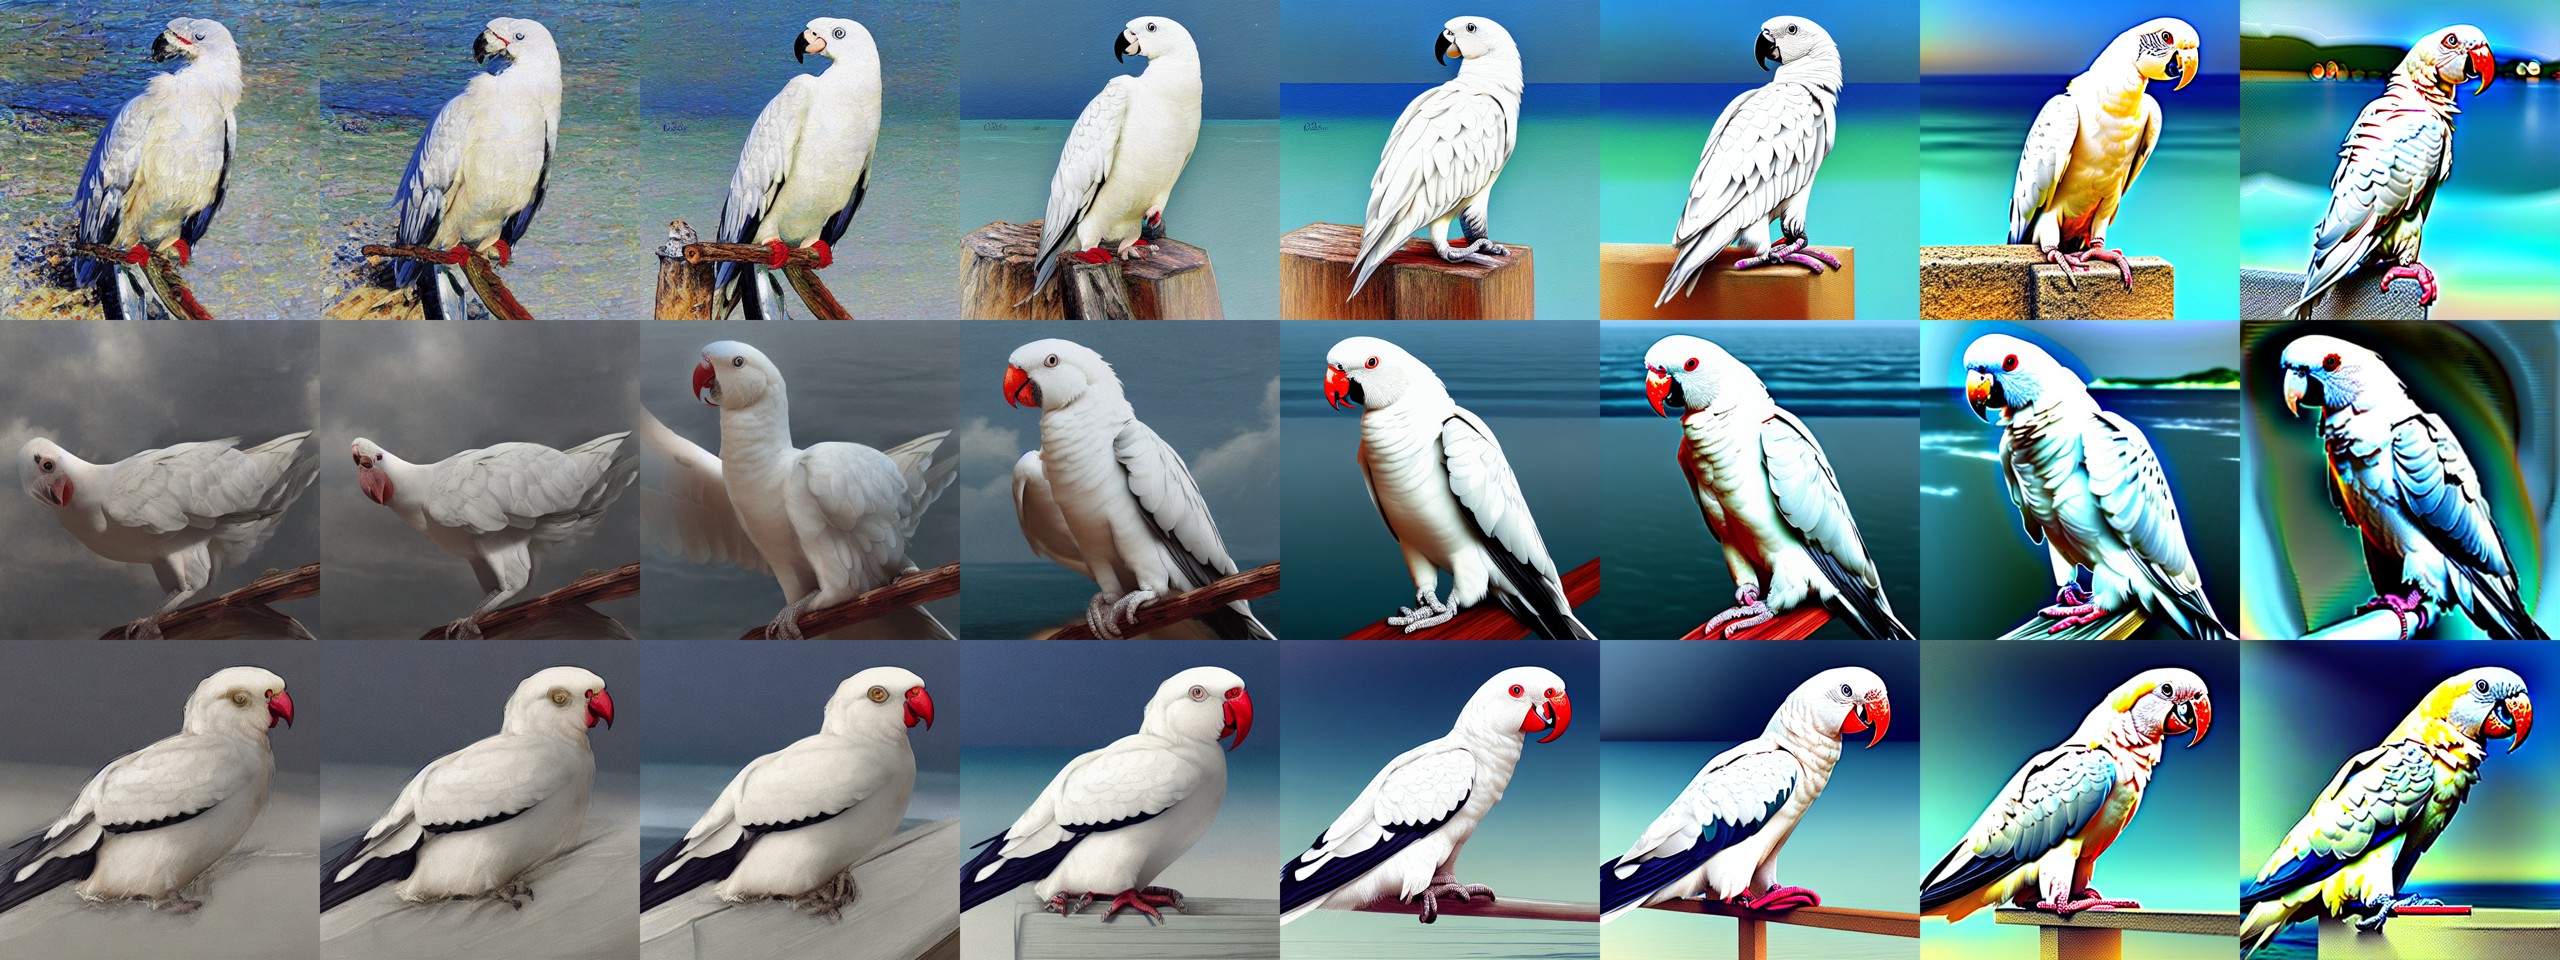
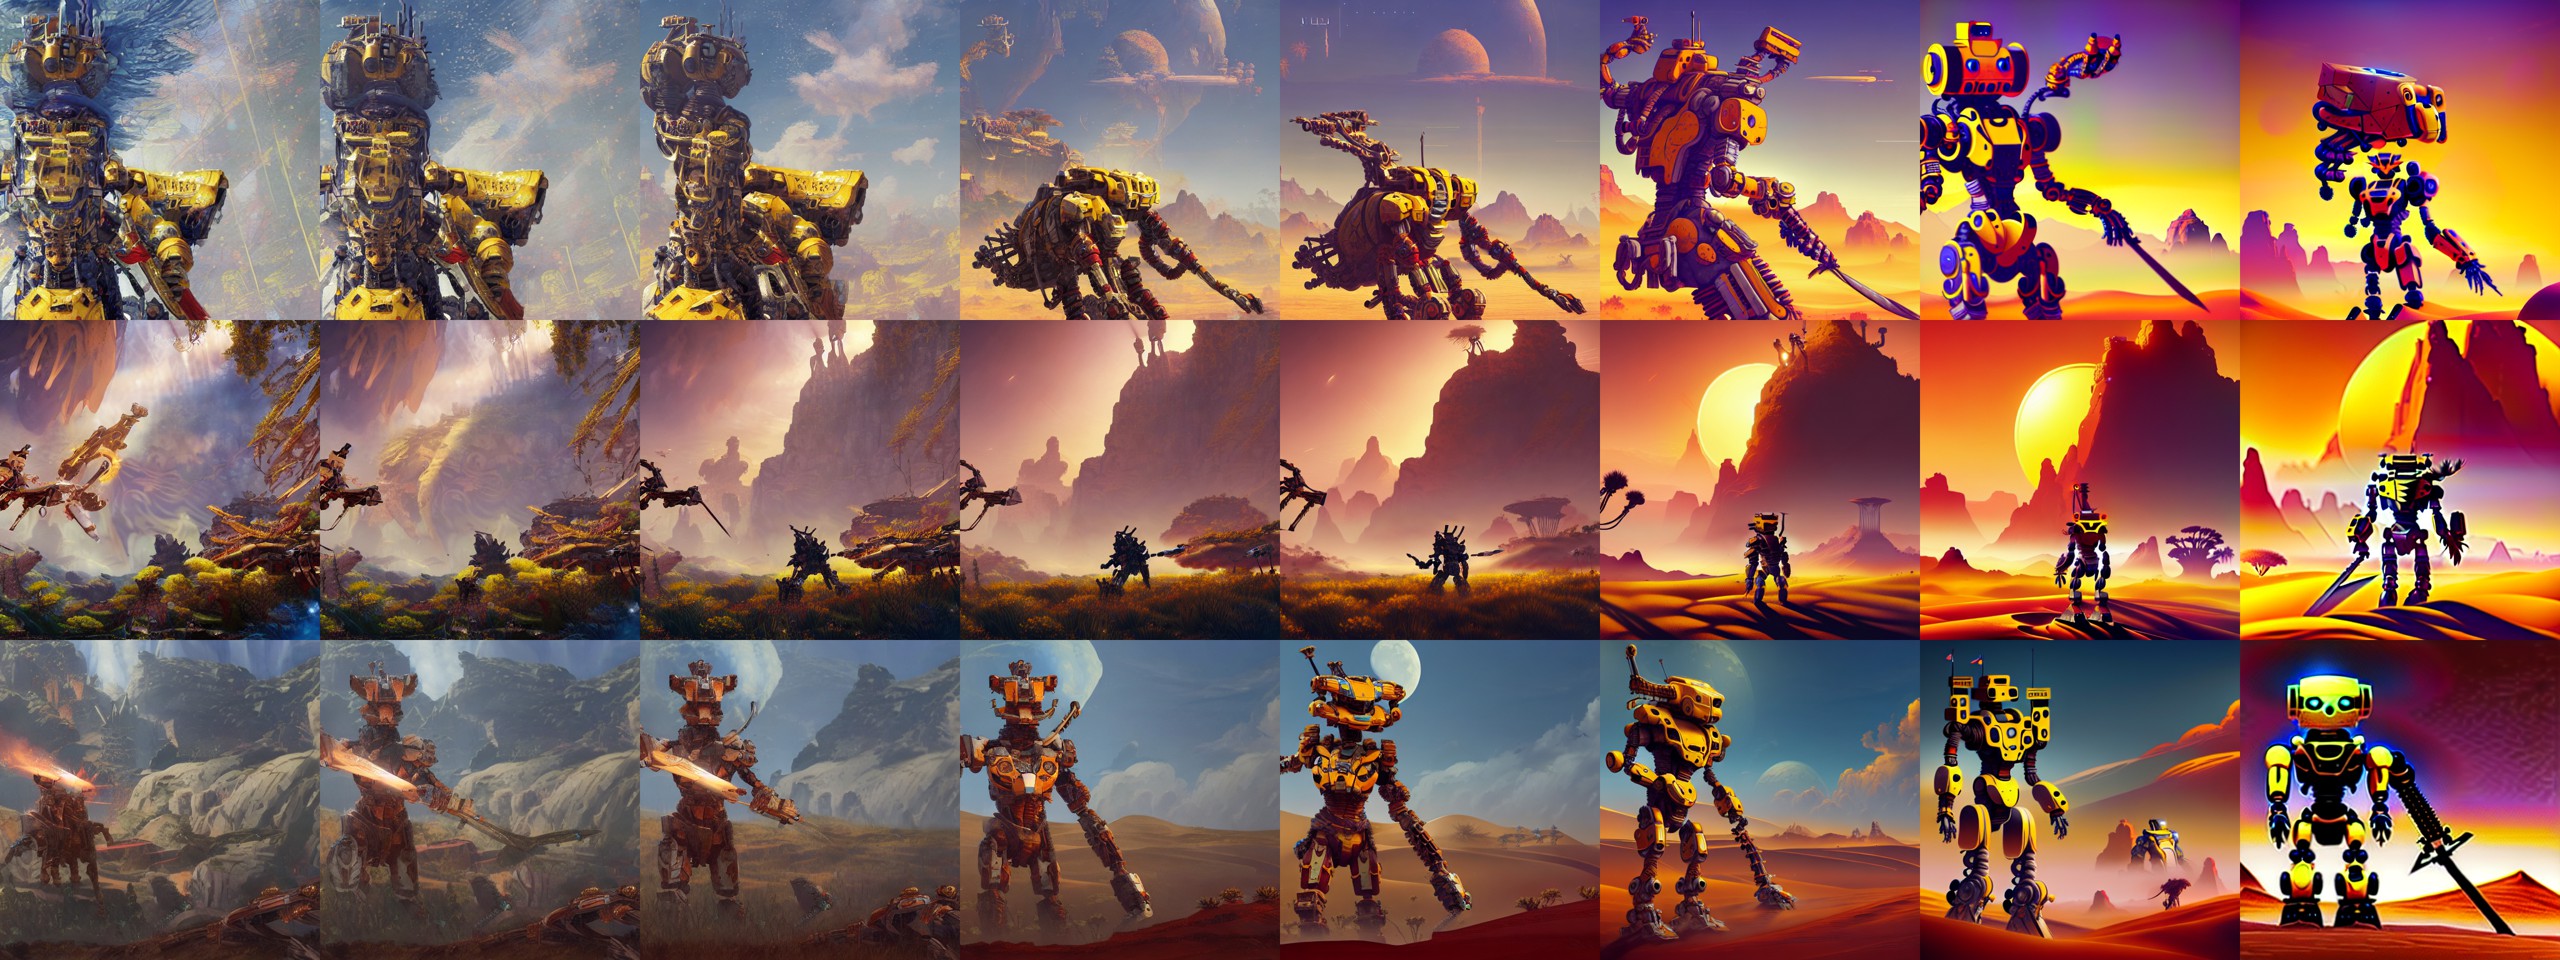
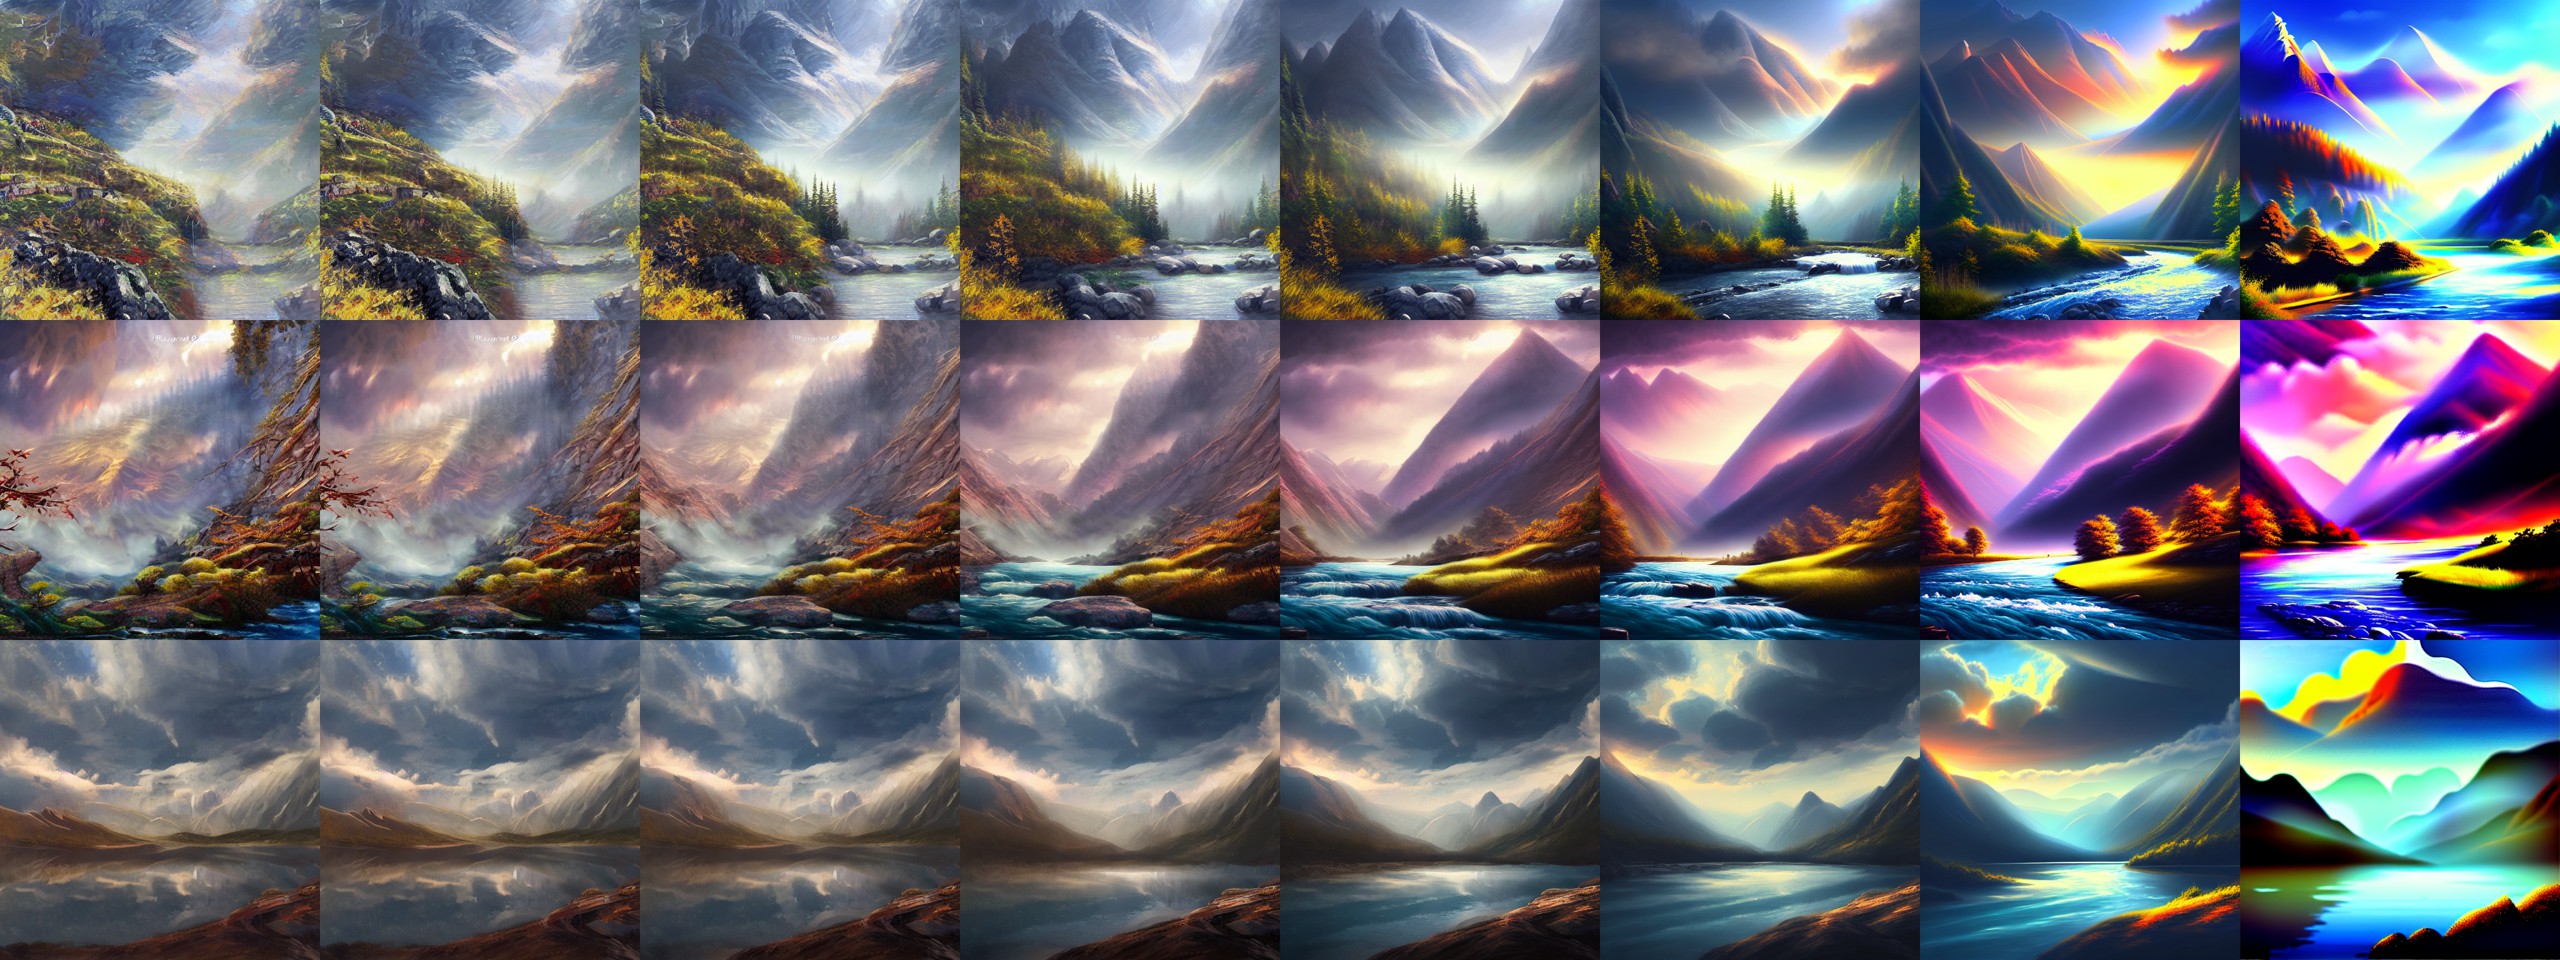
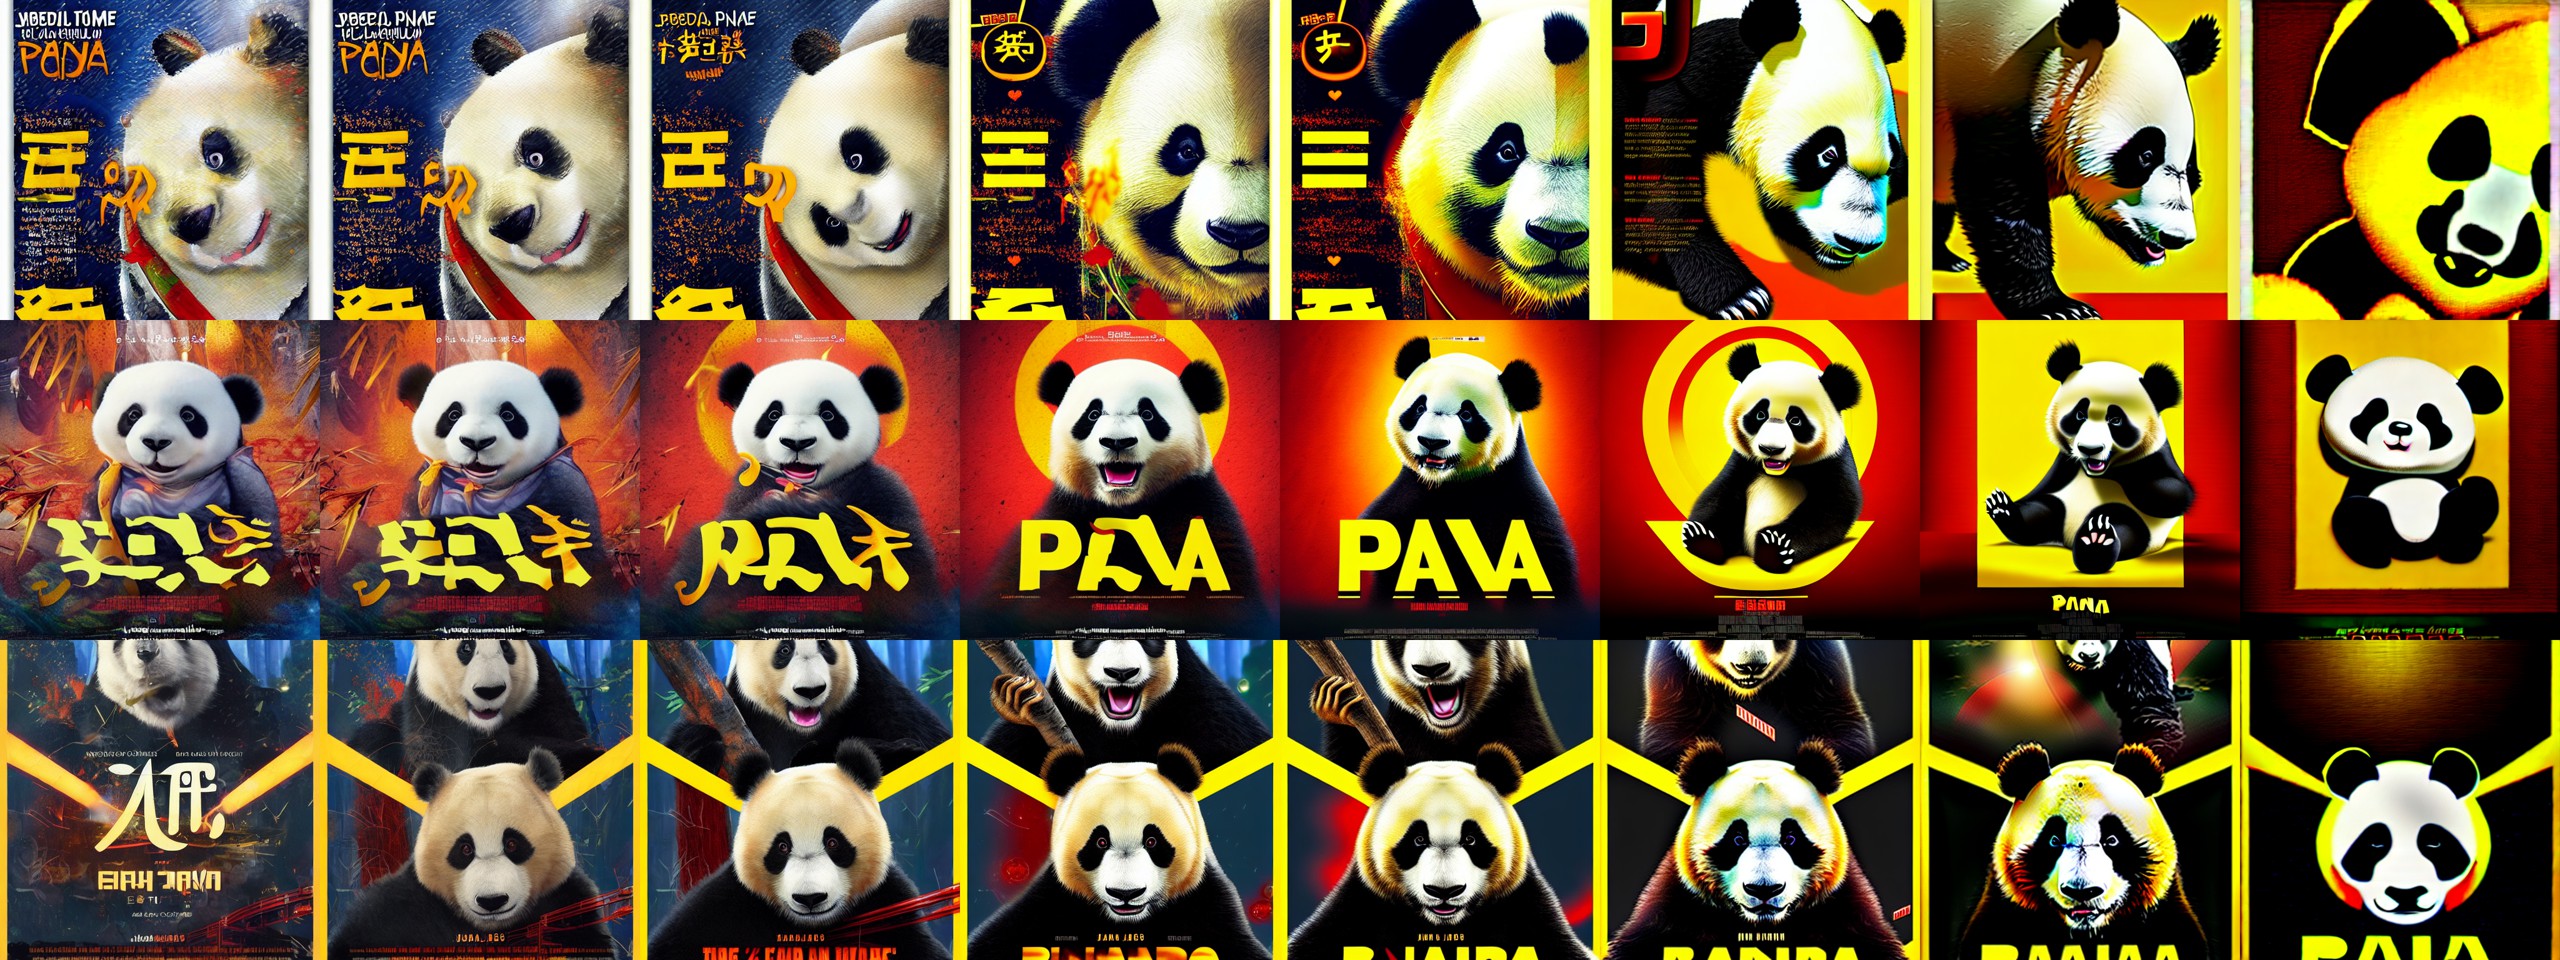
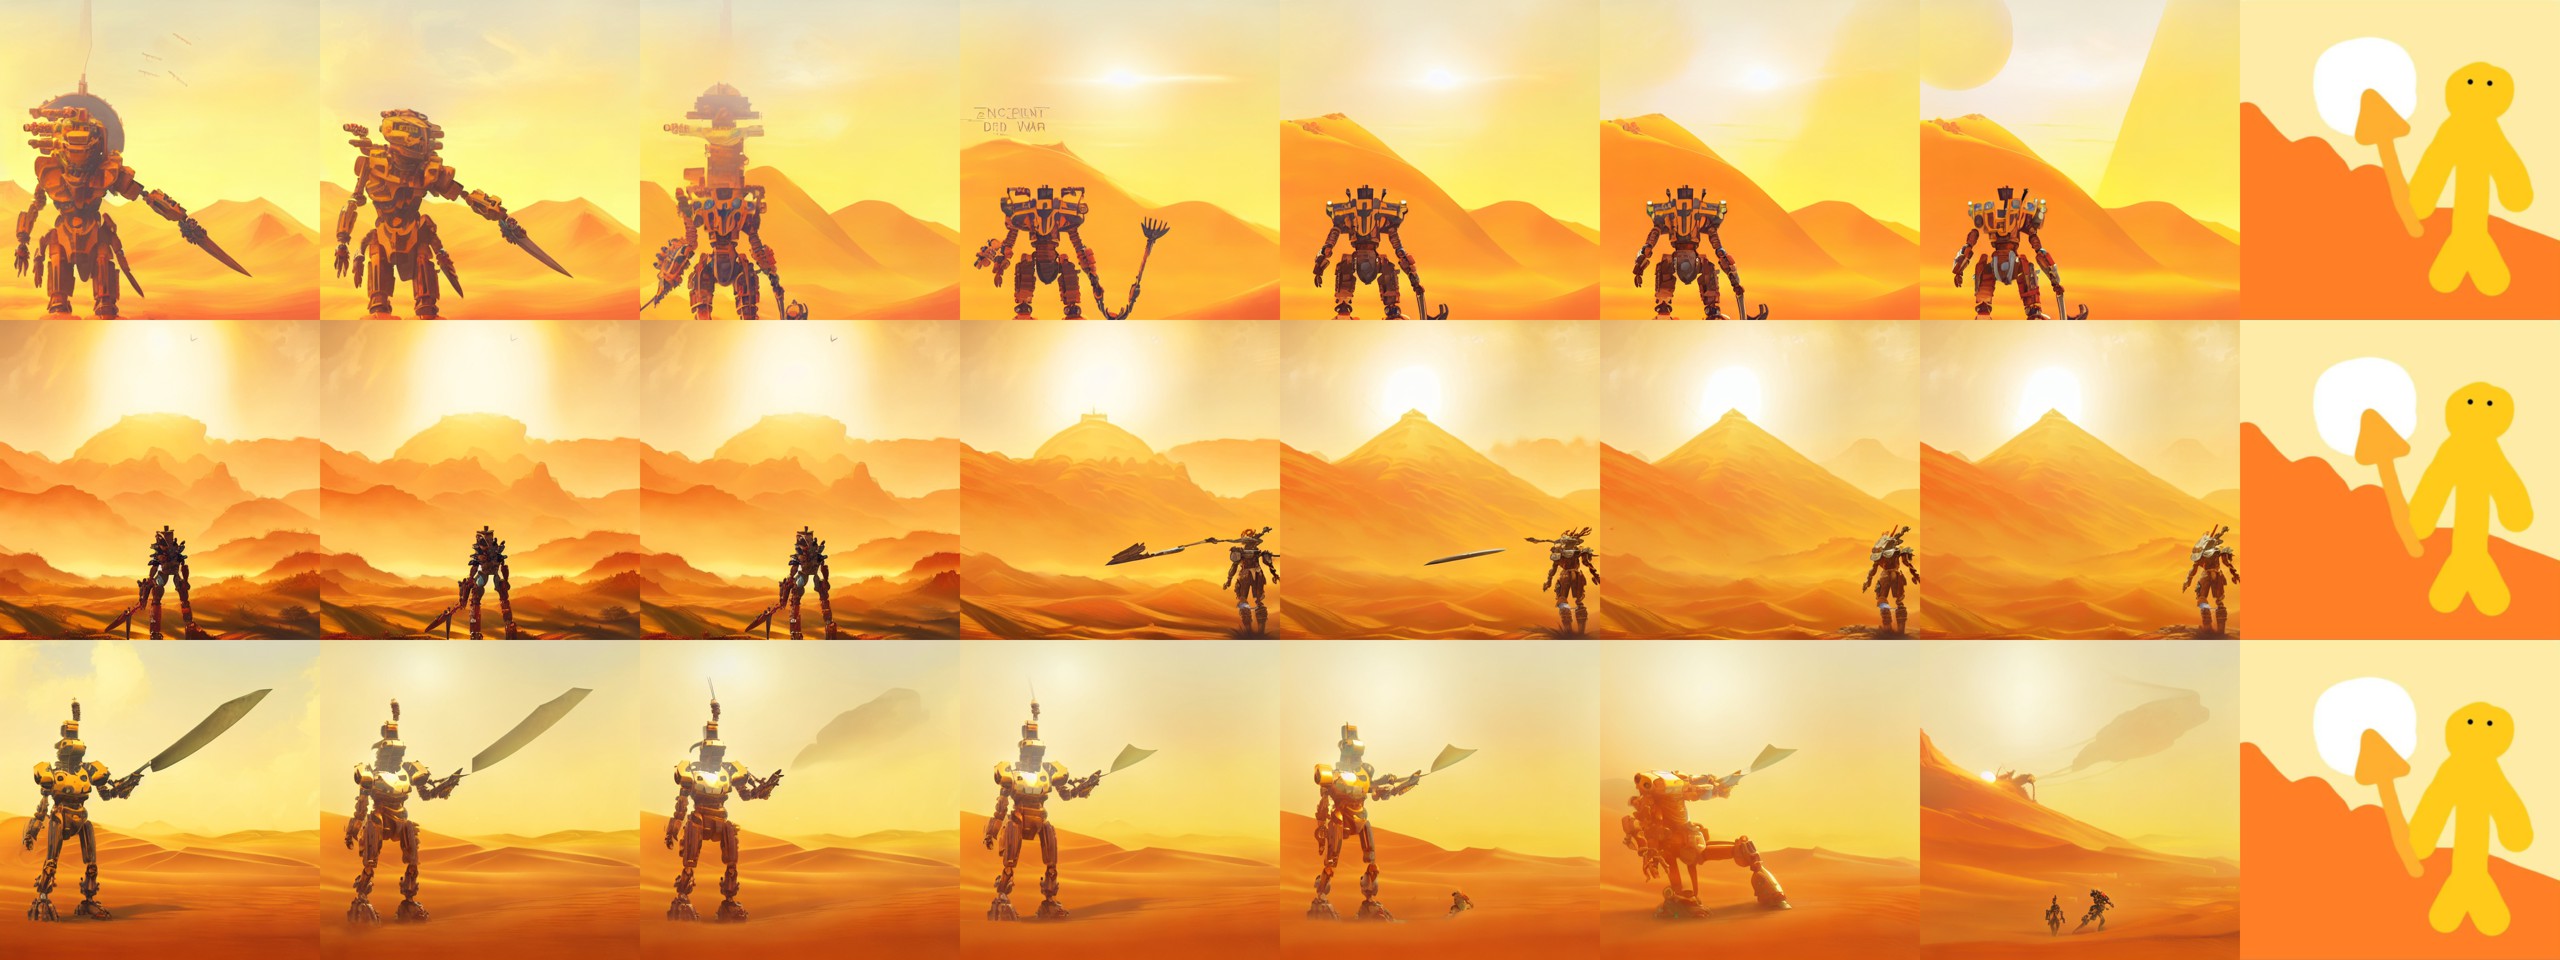
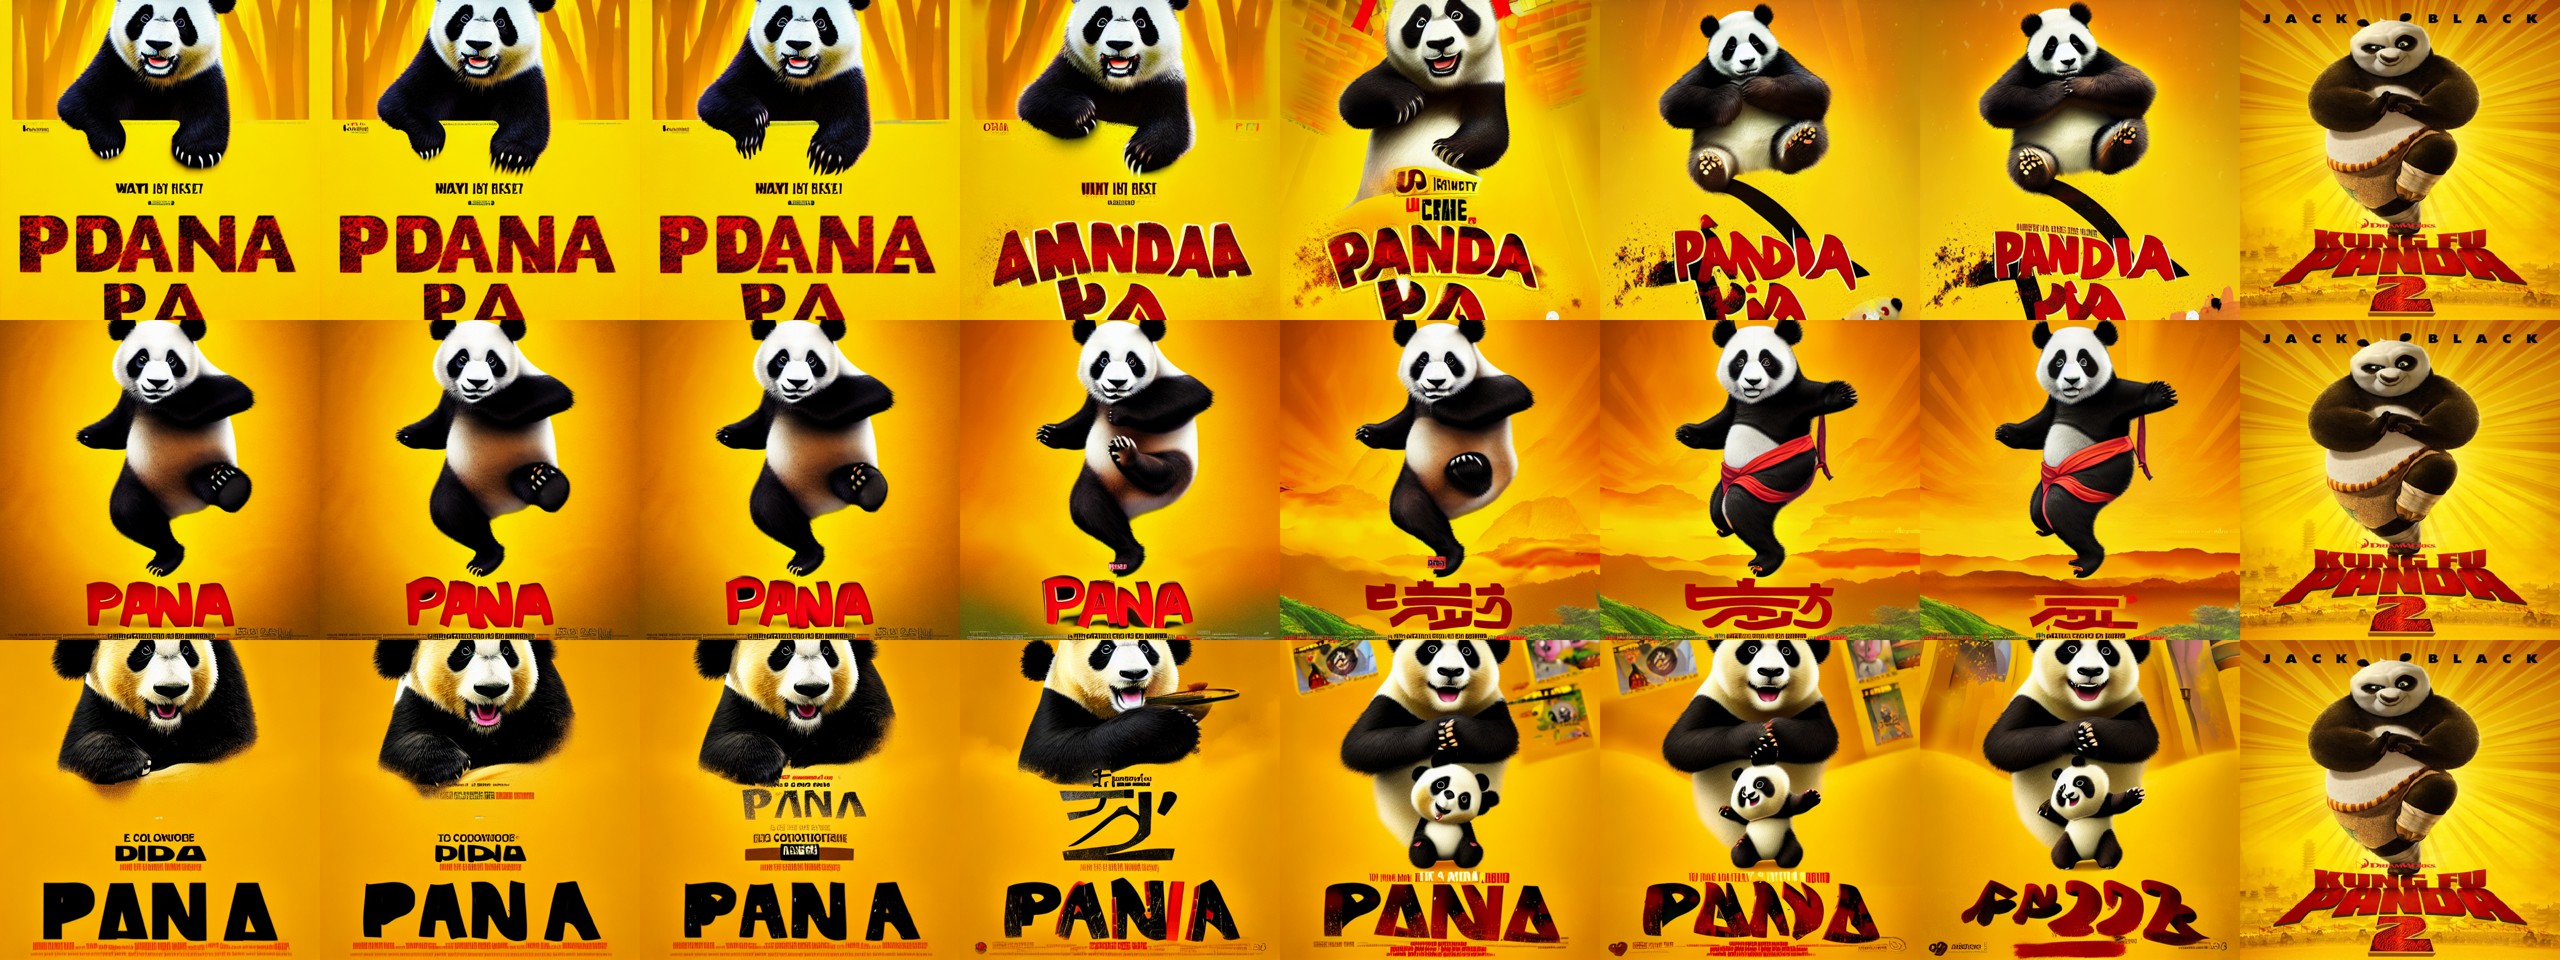
The first varied parameter is the number of denoising steps. The used values are [3, 6, 9, 12, 15, 18, 21, 50], and usually the image has converged by step 50. These results are shown in figures 1 - 5.
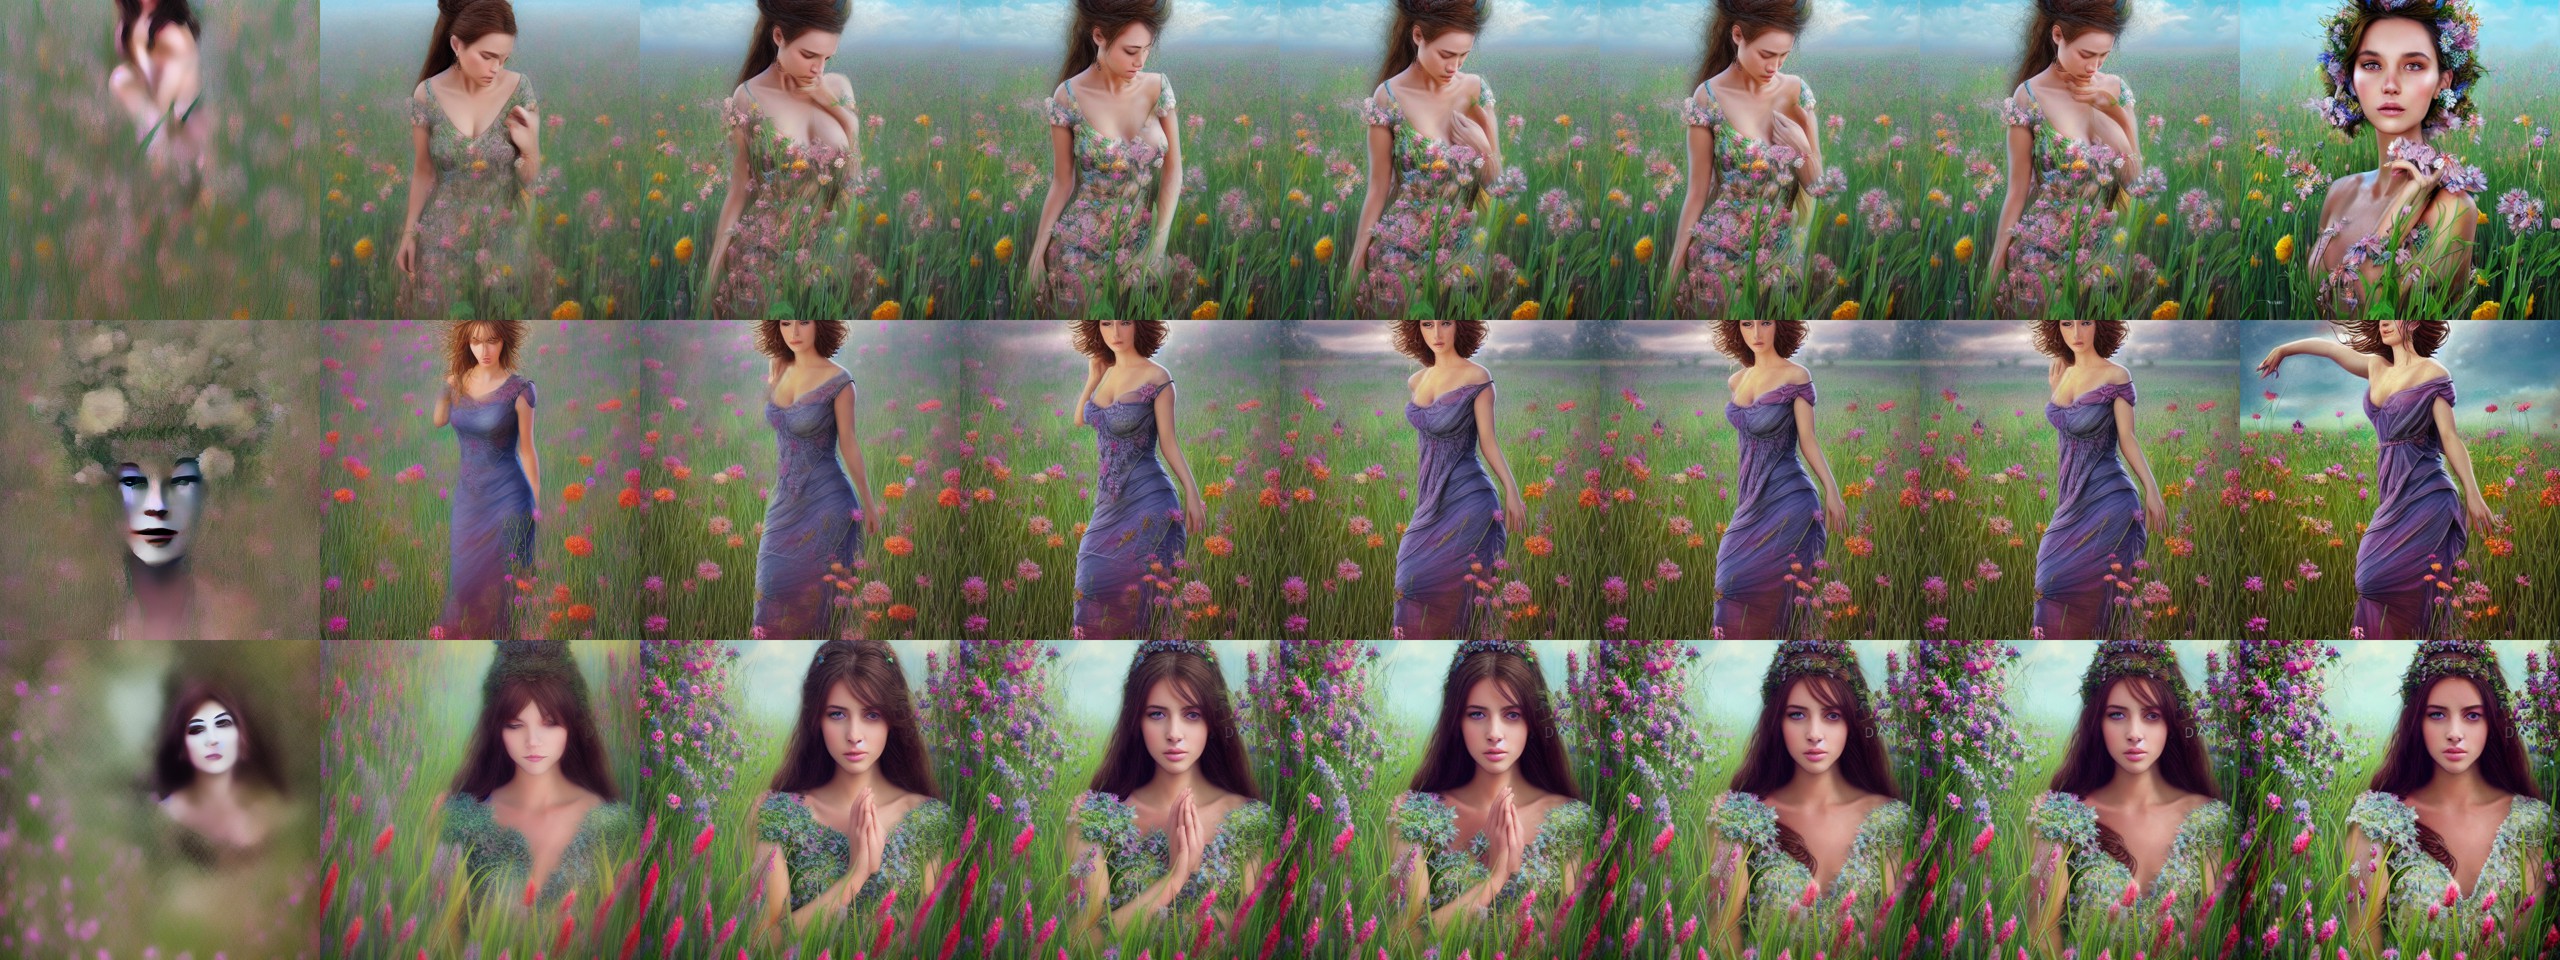
All images have their major aspects defined already with just 10 - 15 denoising steps. Most of the time even going from 24 to 50 steps doesn't change the result in any major way, but of course there are exceptions. The most challenging inputs were "full length portrait of gorgeous goddess standing in field full of flowers" (Figure 3 and "panda movie poster with yellow background and red title text" (Figure 5). They don't have much in common, but the "goddess" has a complex foreground and background, and the "panda" has typography (seems to have either Chinese or English depending on the seed), high-contrasting colors and just a vague idea on how the composition should look like.
This is incontrast to the "a white parrot sitting by the sea" (Figure 1) and "an ancient yellow robot holding a sword on desert" (Figure 2), which have a somewhat constrained pose and a simpler background. Although the set of all possible robots has huge variety.

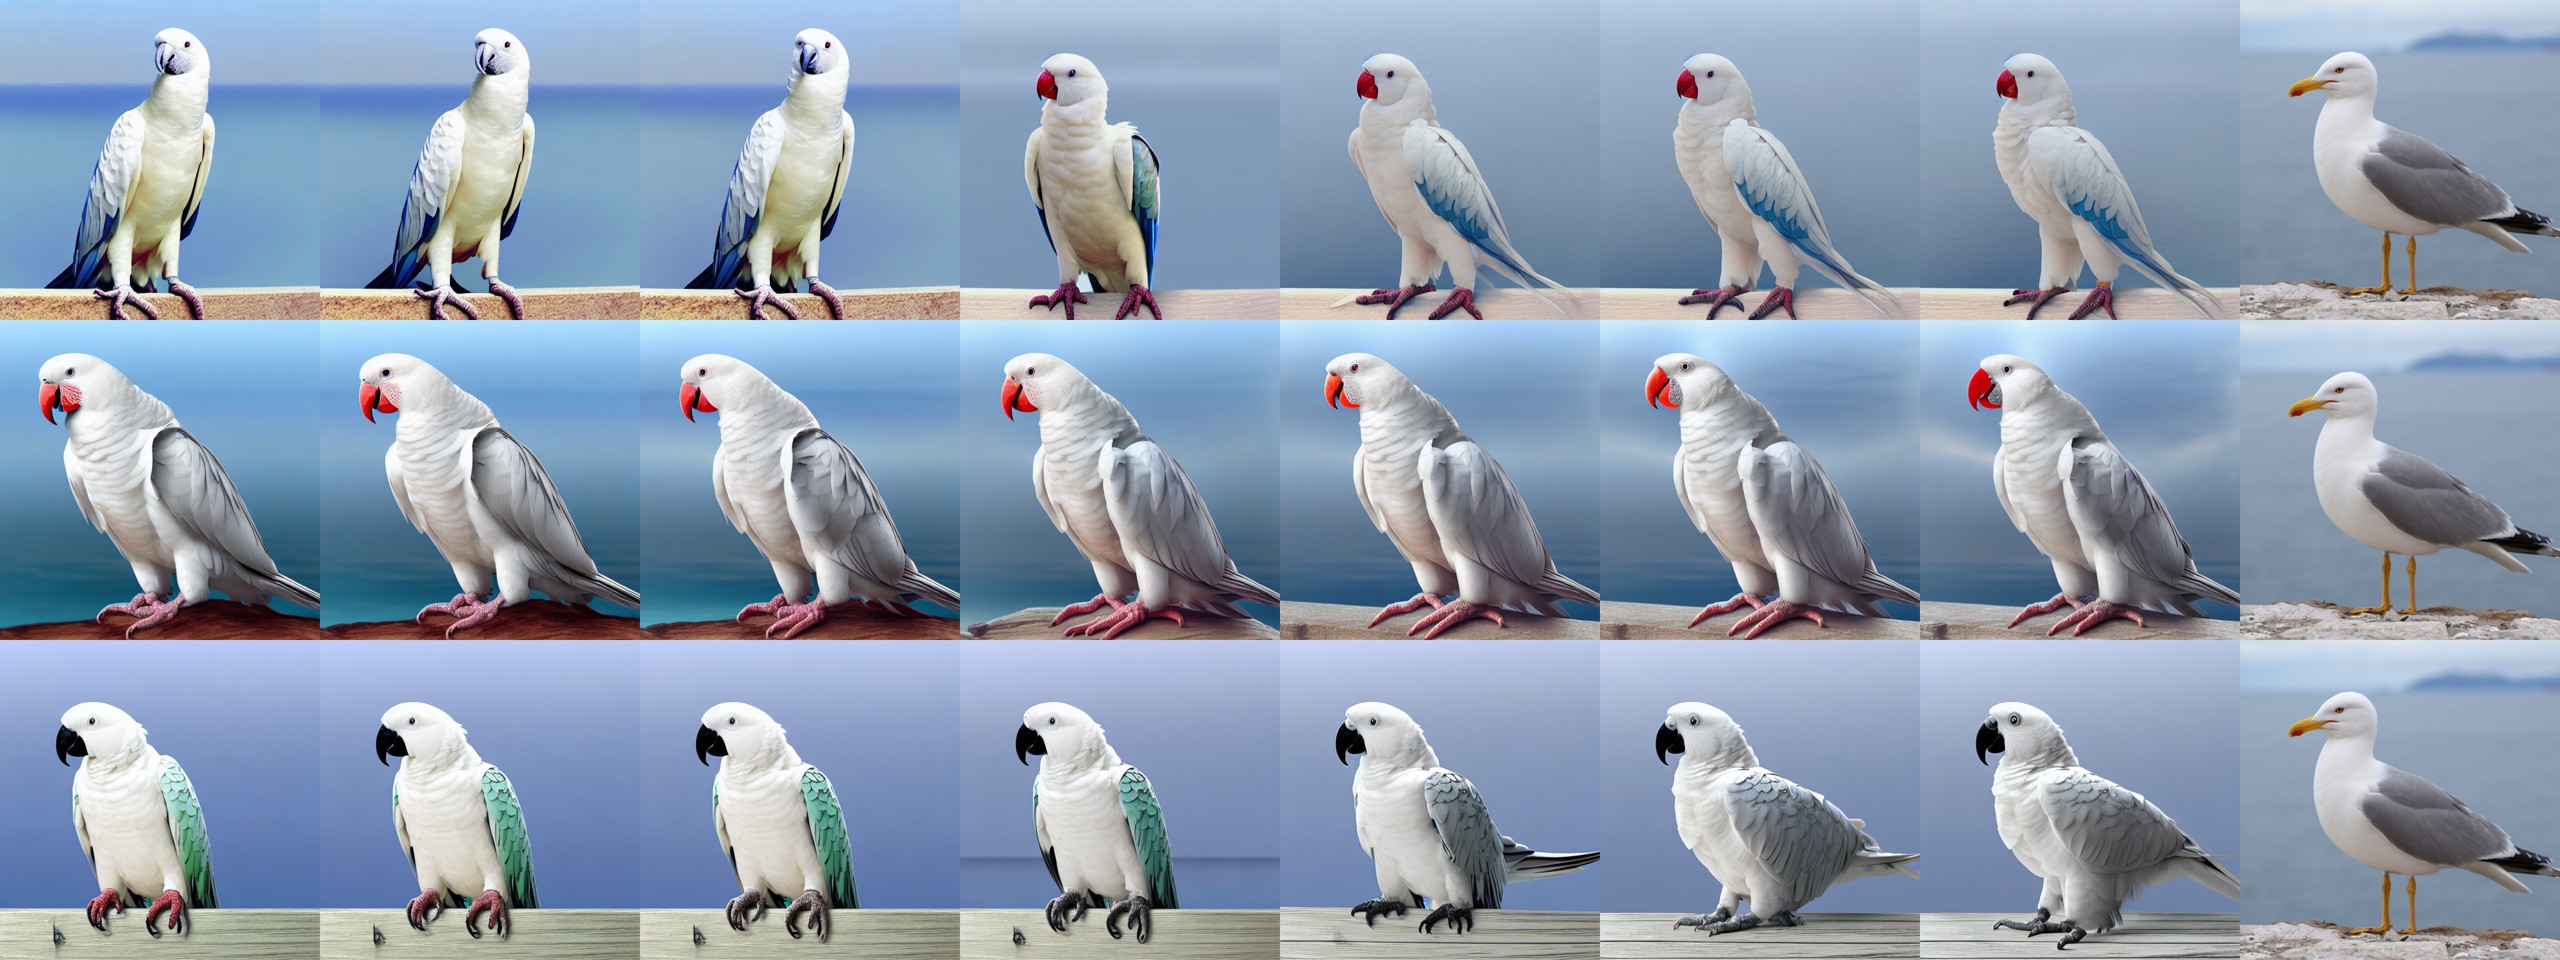
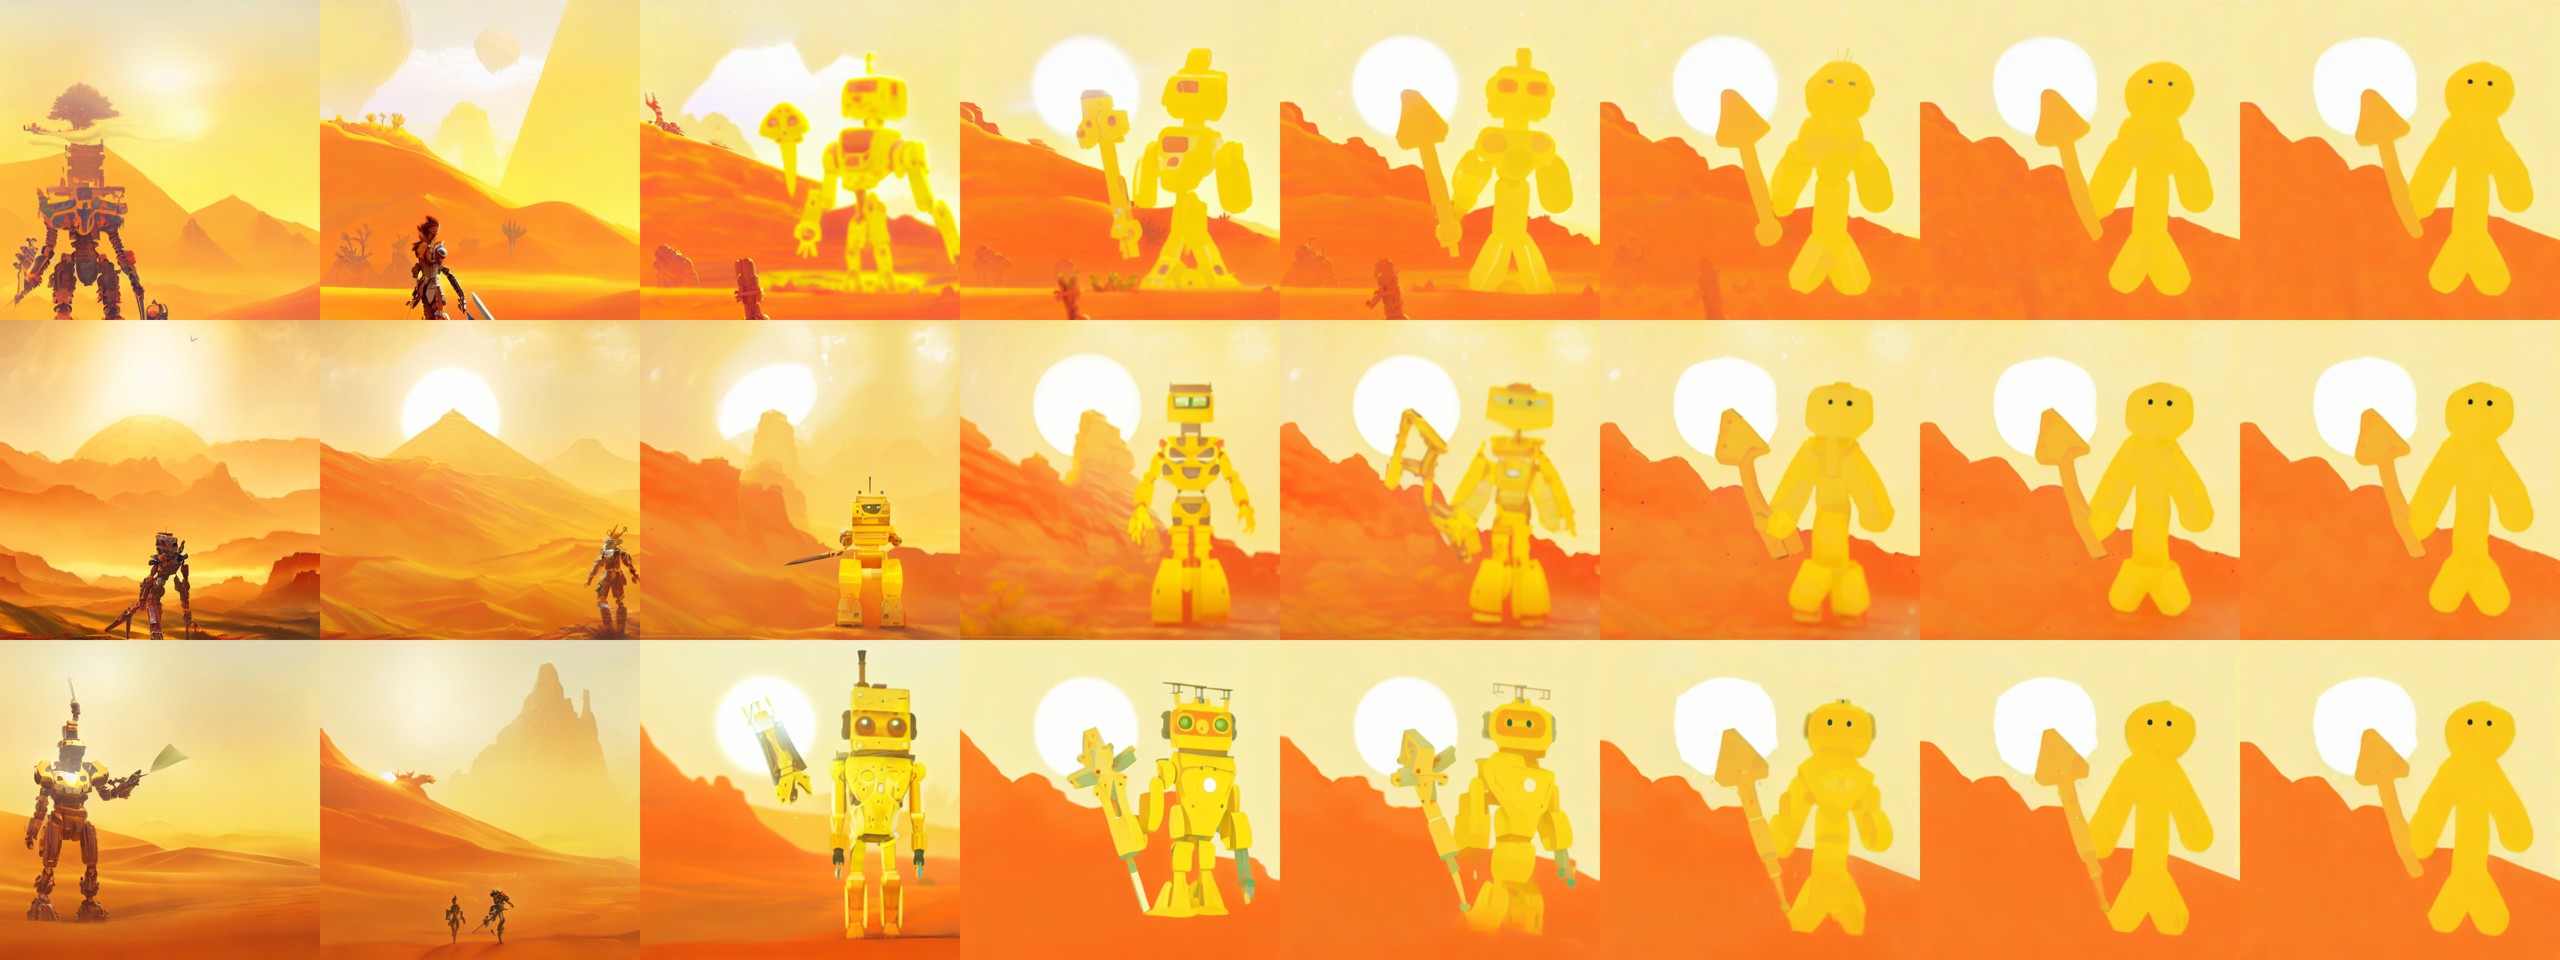
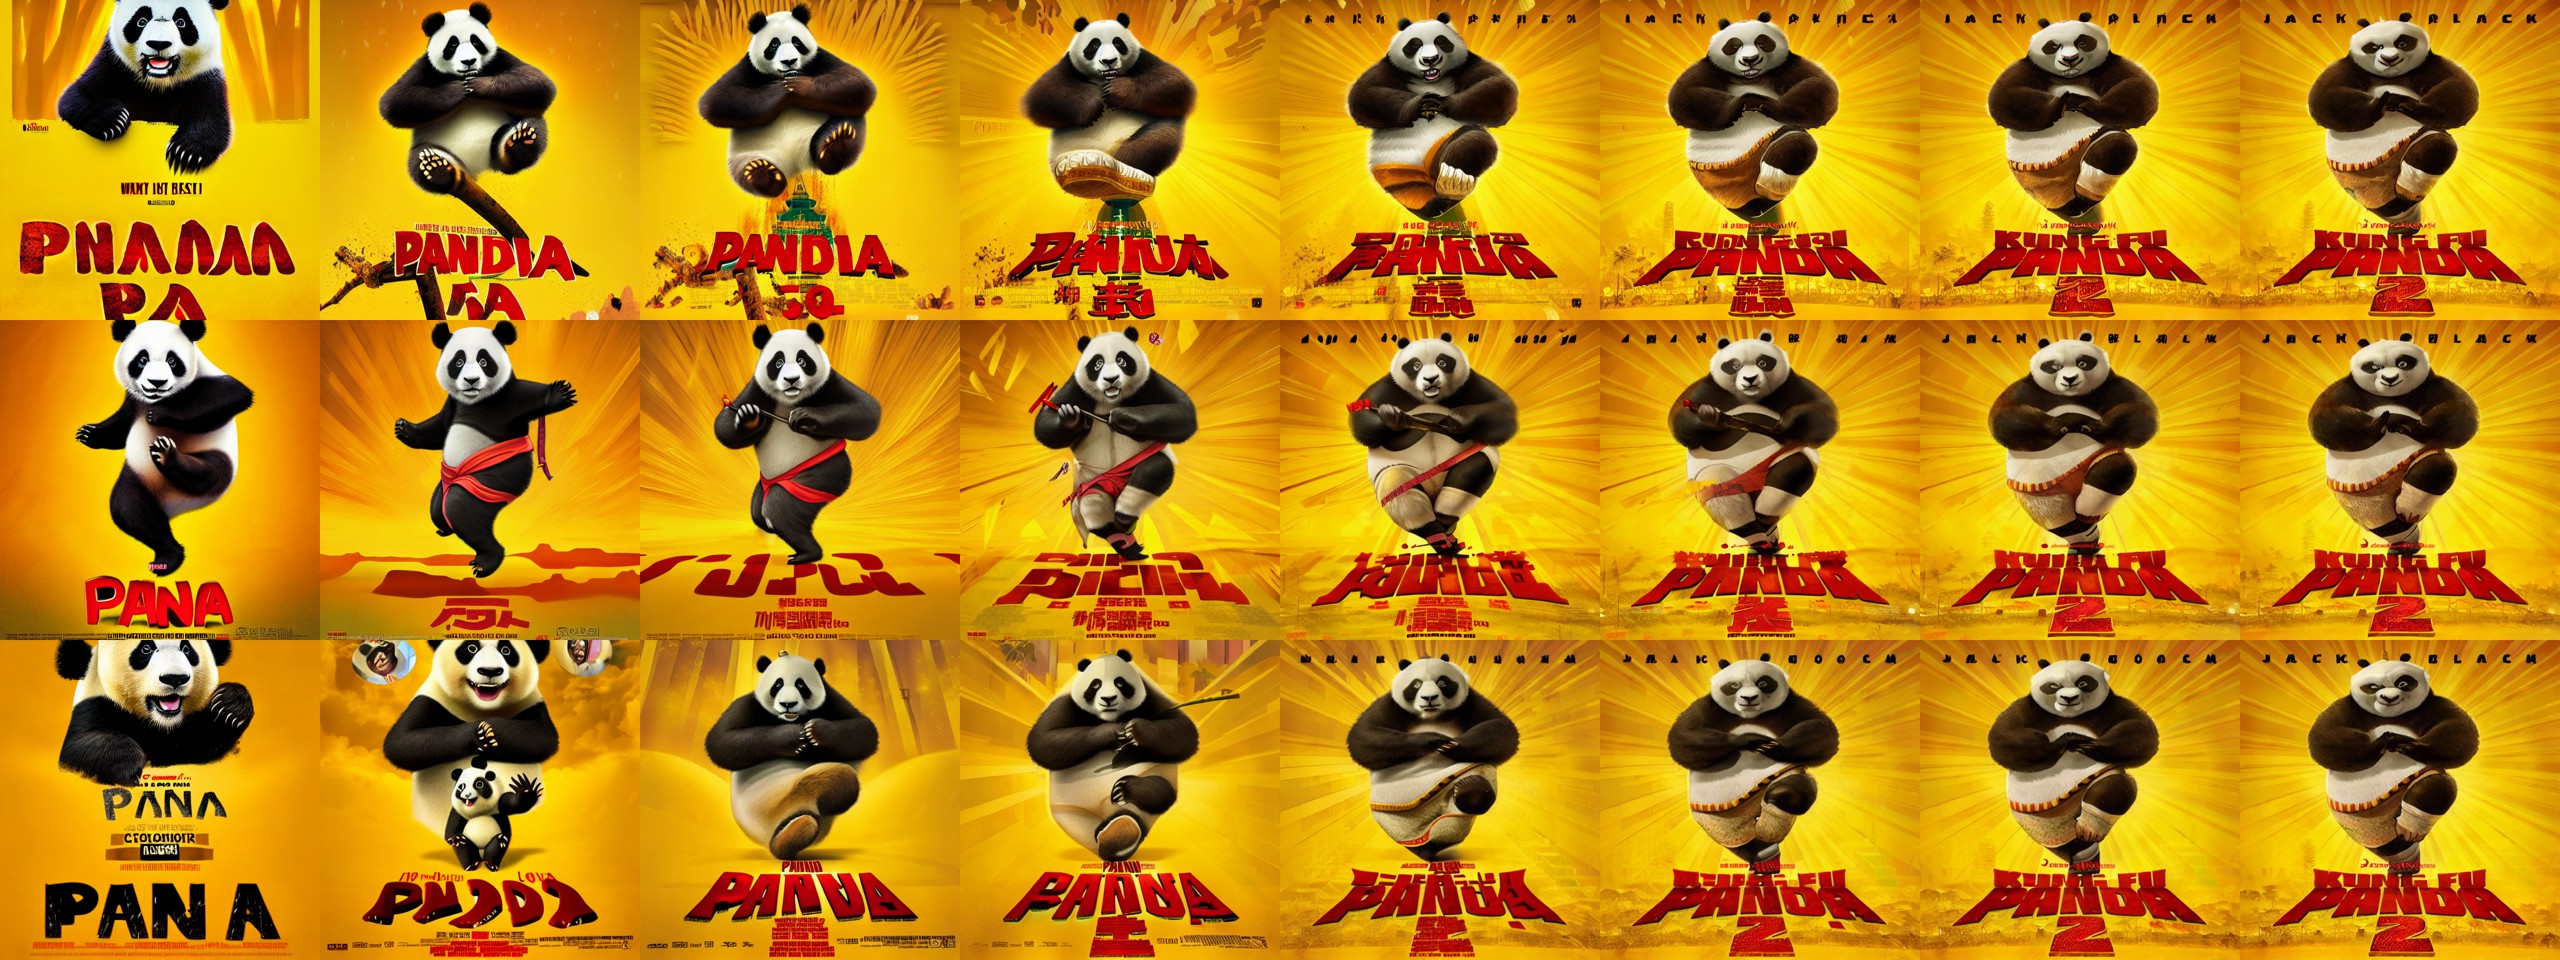
The next studied parameter is the "CFG" or classifier-free guidance scale, or just "scale". It is described for example at diffusion-news.org, but the conclusions there are conflicting with experimental results which are shown in this article. According to the article, it "is a measure of how close you want the model to stick to your prompt when looking for a related image to show you. A Cfg Scale value of 0 will give you essentially a random image based on the seed, where as a Cfg Scale of 20 (the maximum on SD) will give you the closest match to your prompt that the model can produce." They even run the tests with various different samplers, but those aren't covered in this article for the sake of sticking to basics.
Tested CFG scales are from the formula 1 + 6.5 * 10i, where i is interpolated linearly between -1 and 1. This was chosen so that the default scale of 7.5 is in the middle. The values (rounded to two decimals) are [1.65, 2.25, 3.42, 5.68, 10.03, 18.44, 34.67, 66.0]. But the actual middle value 7.5 isn't present in the list, since there is an even number of samples. Examples are shown in figures 6 - 10.
The scale parameter has a very concrete impact on the resulting artistic style. Smaller numbers seem to cause the iteration to focus on smaller scale detail, and the overall contrast and saturation is fairly weak. But if such artistic style is desired, contrast and saturation can be easily fixed in post-processing. Parameters 6 - 8 give the most realistic and well-balanced results. Going beyond that, the results get progressively to the opposite direction. They have very vibrant colors, have high global contrast but are lacking in small details.
CFG scale parameter summary: Use smaller values for intricate hand-drawn style, the default 7.5 for realistic photos and larger values for pop-art style with high contrast and saturated colors. But going to either extreme may require further tweaking in a photo-editing software.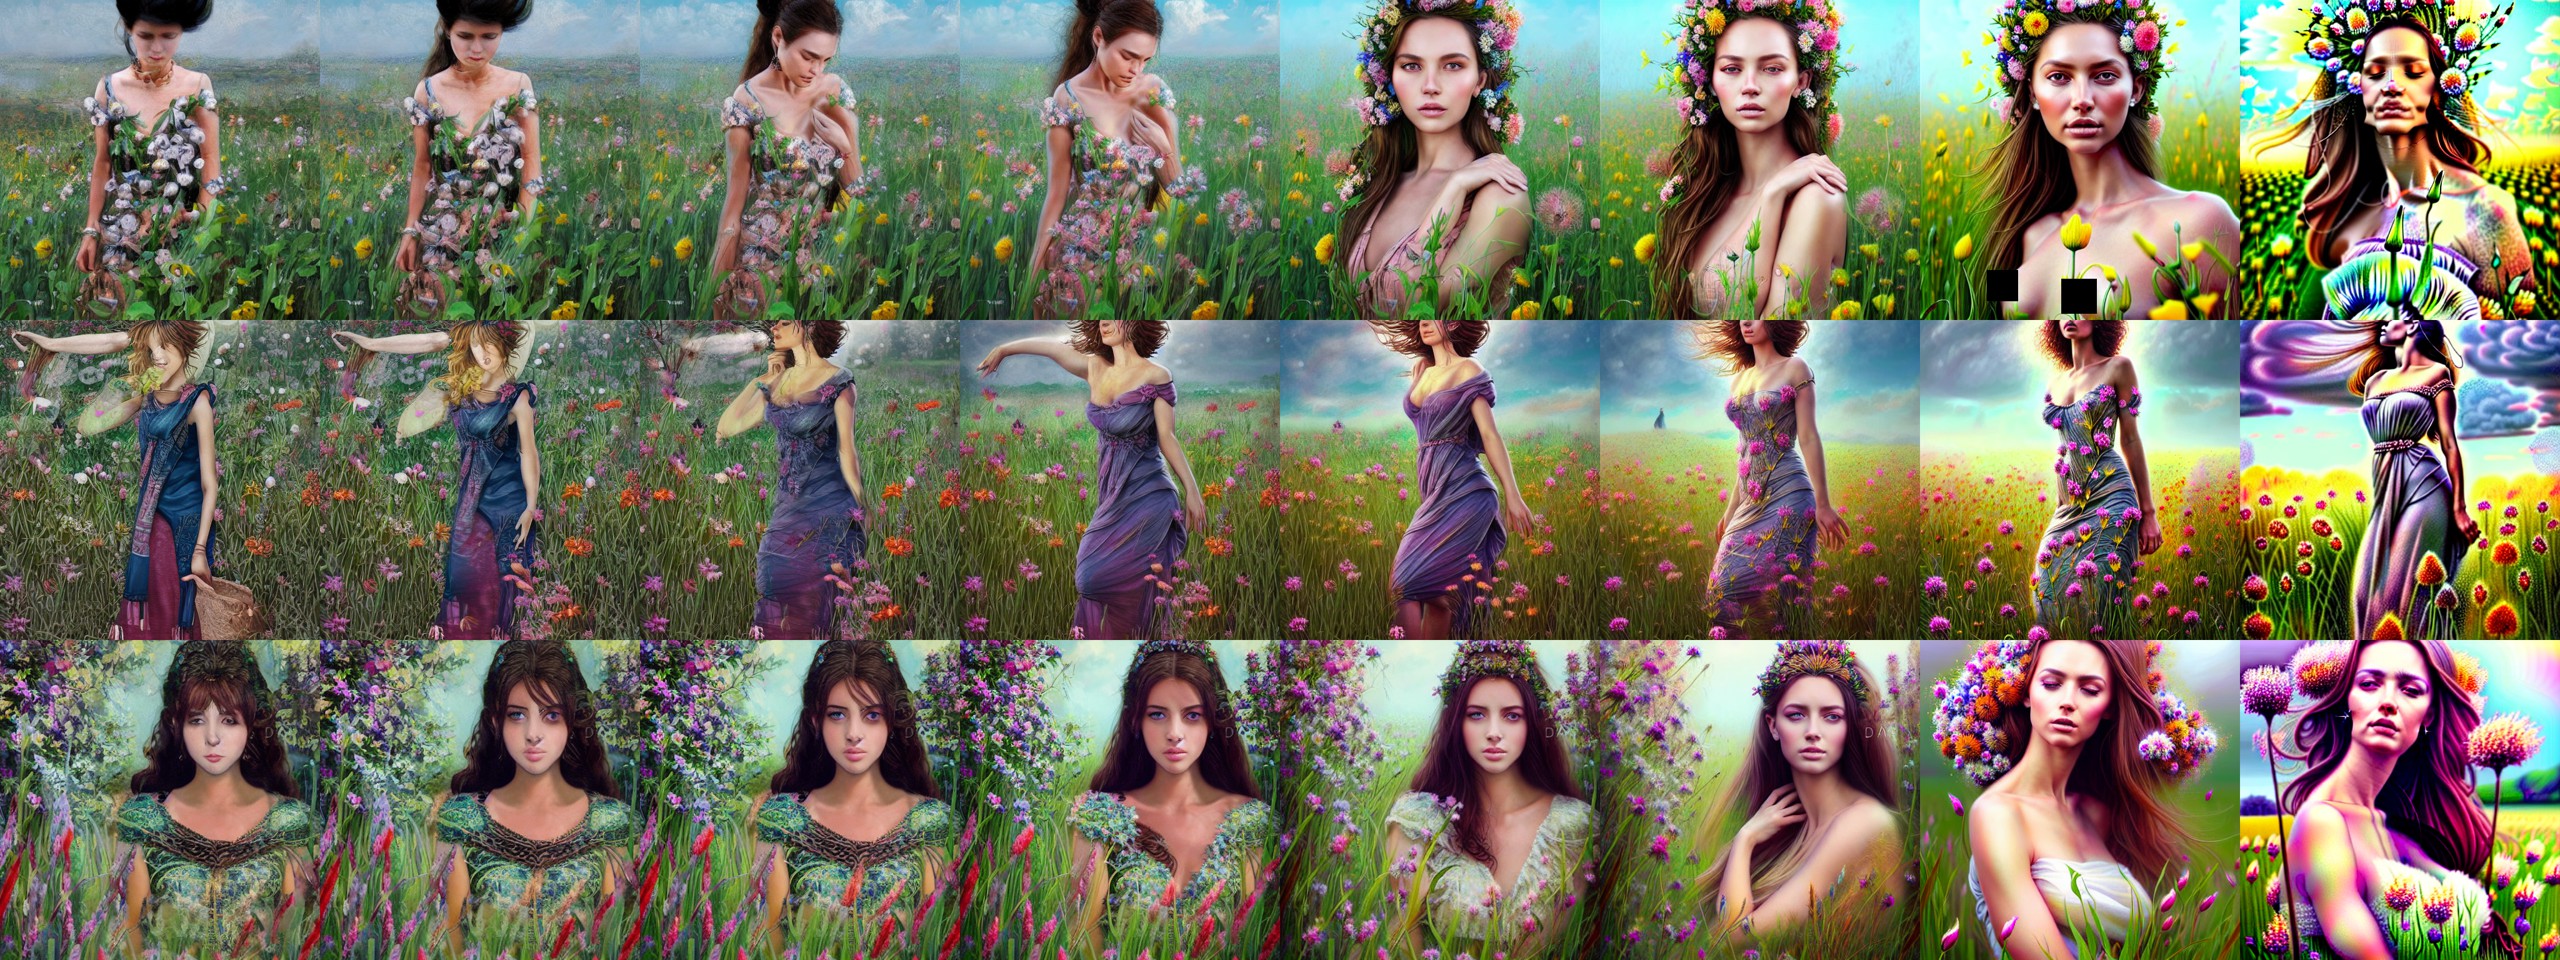
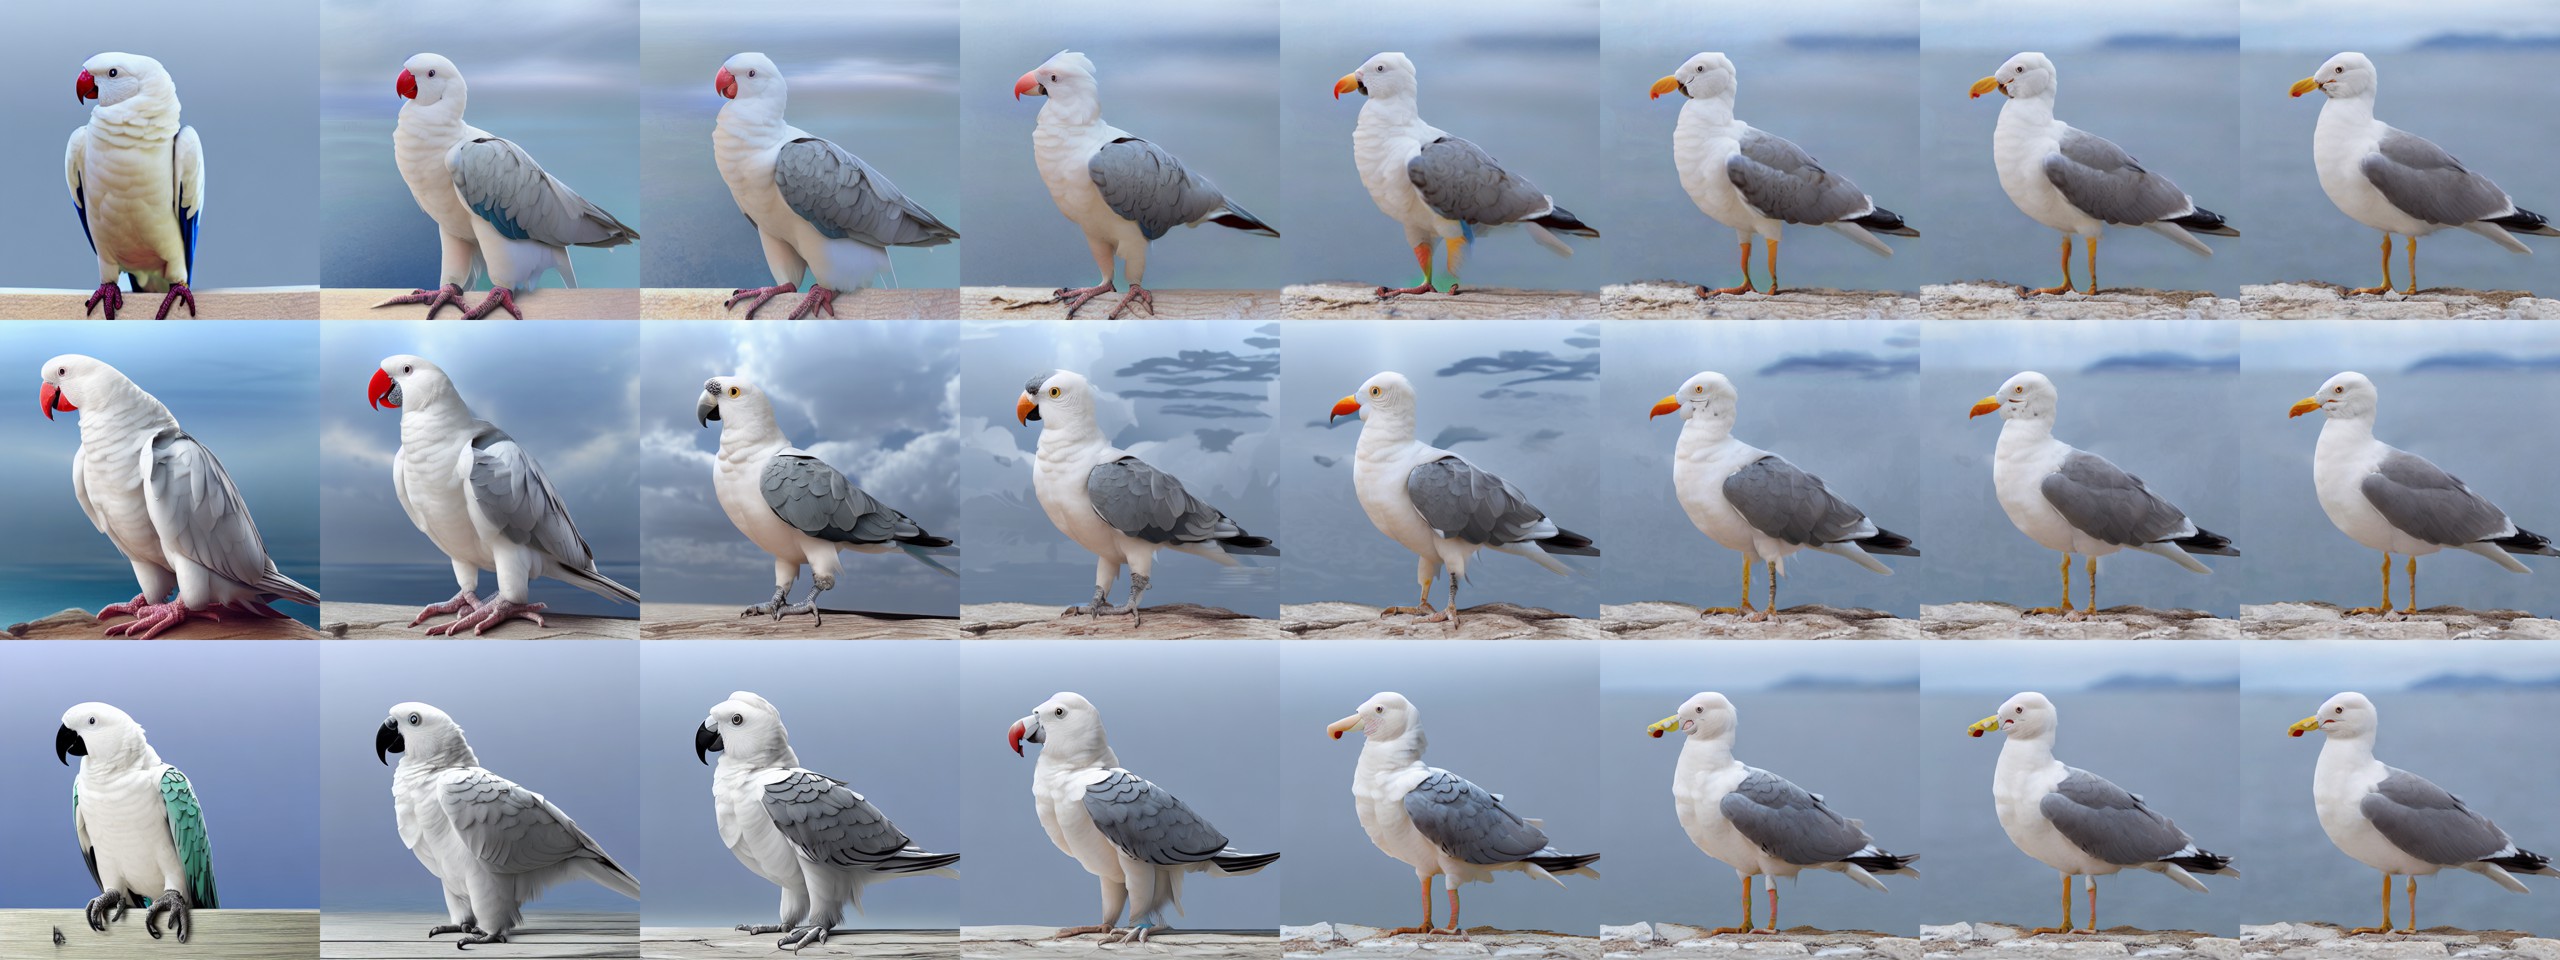
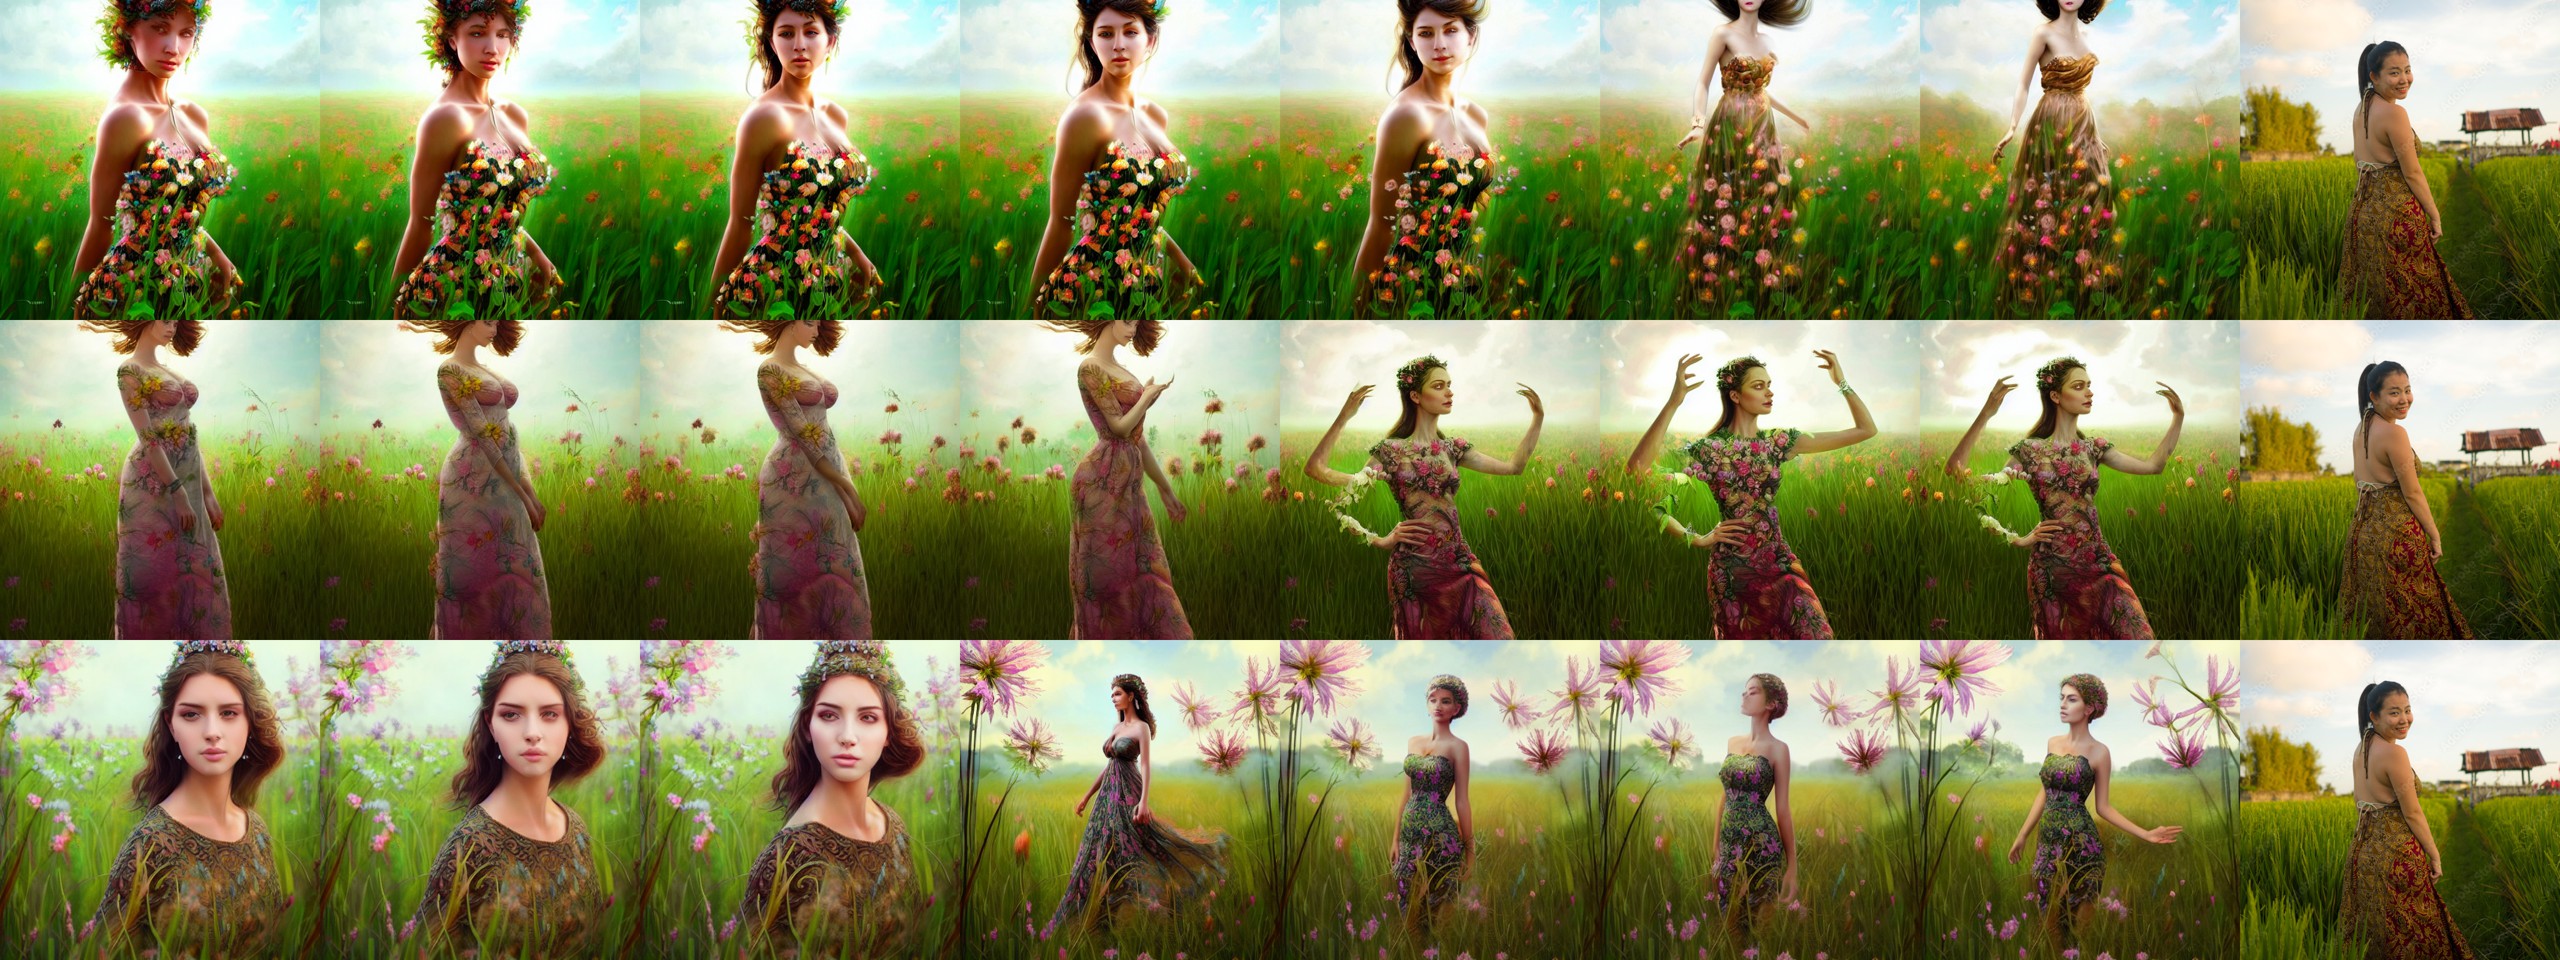
The next studied parameter is the img2img strength (or "weight"), a value between 0% and 100%. The all previously described parameters still play a role, but here they are kept to their default values (running for 50 steps and the CFG scale is 7.5). Note that because of reasons, the strength has an opposite convention that original work such as source code at github.com/CompVis/stable-diffusion which says "strength is a value between 0.0 and 1.0, that controls the amount of noise that is added to the input image. Values that approach 1.0 allow for lots of variations but will also produce images that are not semantically consistent with the input." Basically it is a trade-off parameter between the image generated purely from the prompt, and the target image. 0% noise means that the output resembles the target 100%, and 100% noise means that the target image has no impact. Hopefully this isn't confusing anybody.
The weight is a very delicate parameter to tune, and if the two images (from the prompt and the target) are very different, then there might be a tipping point where changing the weight even a little bit will have a large change in the resulting image. However this depends very much on the context, and on many experiments the results had a nice gradular change. But because of this, the img2img exeperiments were run with two different parameter gradients. The first one uses weights [0.03, 0.06, 0.09, 0.12, 0.15, 0.18, 0.21], and the second one uses [0.1, 0.2, 0.3, 0.4, 0.5, 0.6, 0.7]. The results are shwon in figures 11 - 20. Note that only seven different weights were used, but images consist of eight columns. This is because the right-most picture always shows the target image (corresponding to a strength of 1.0, or noise-level of zero).
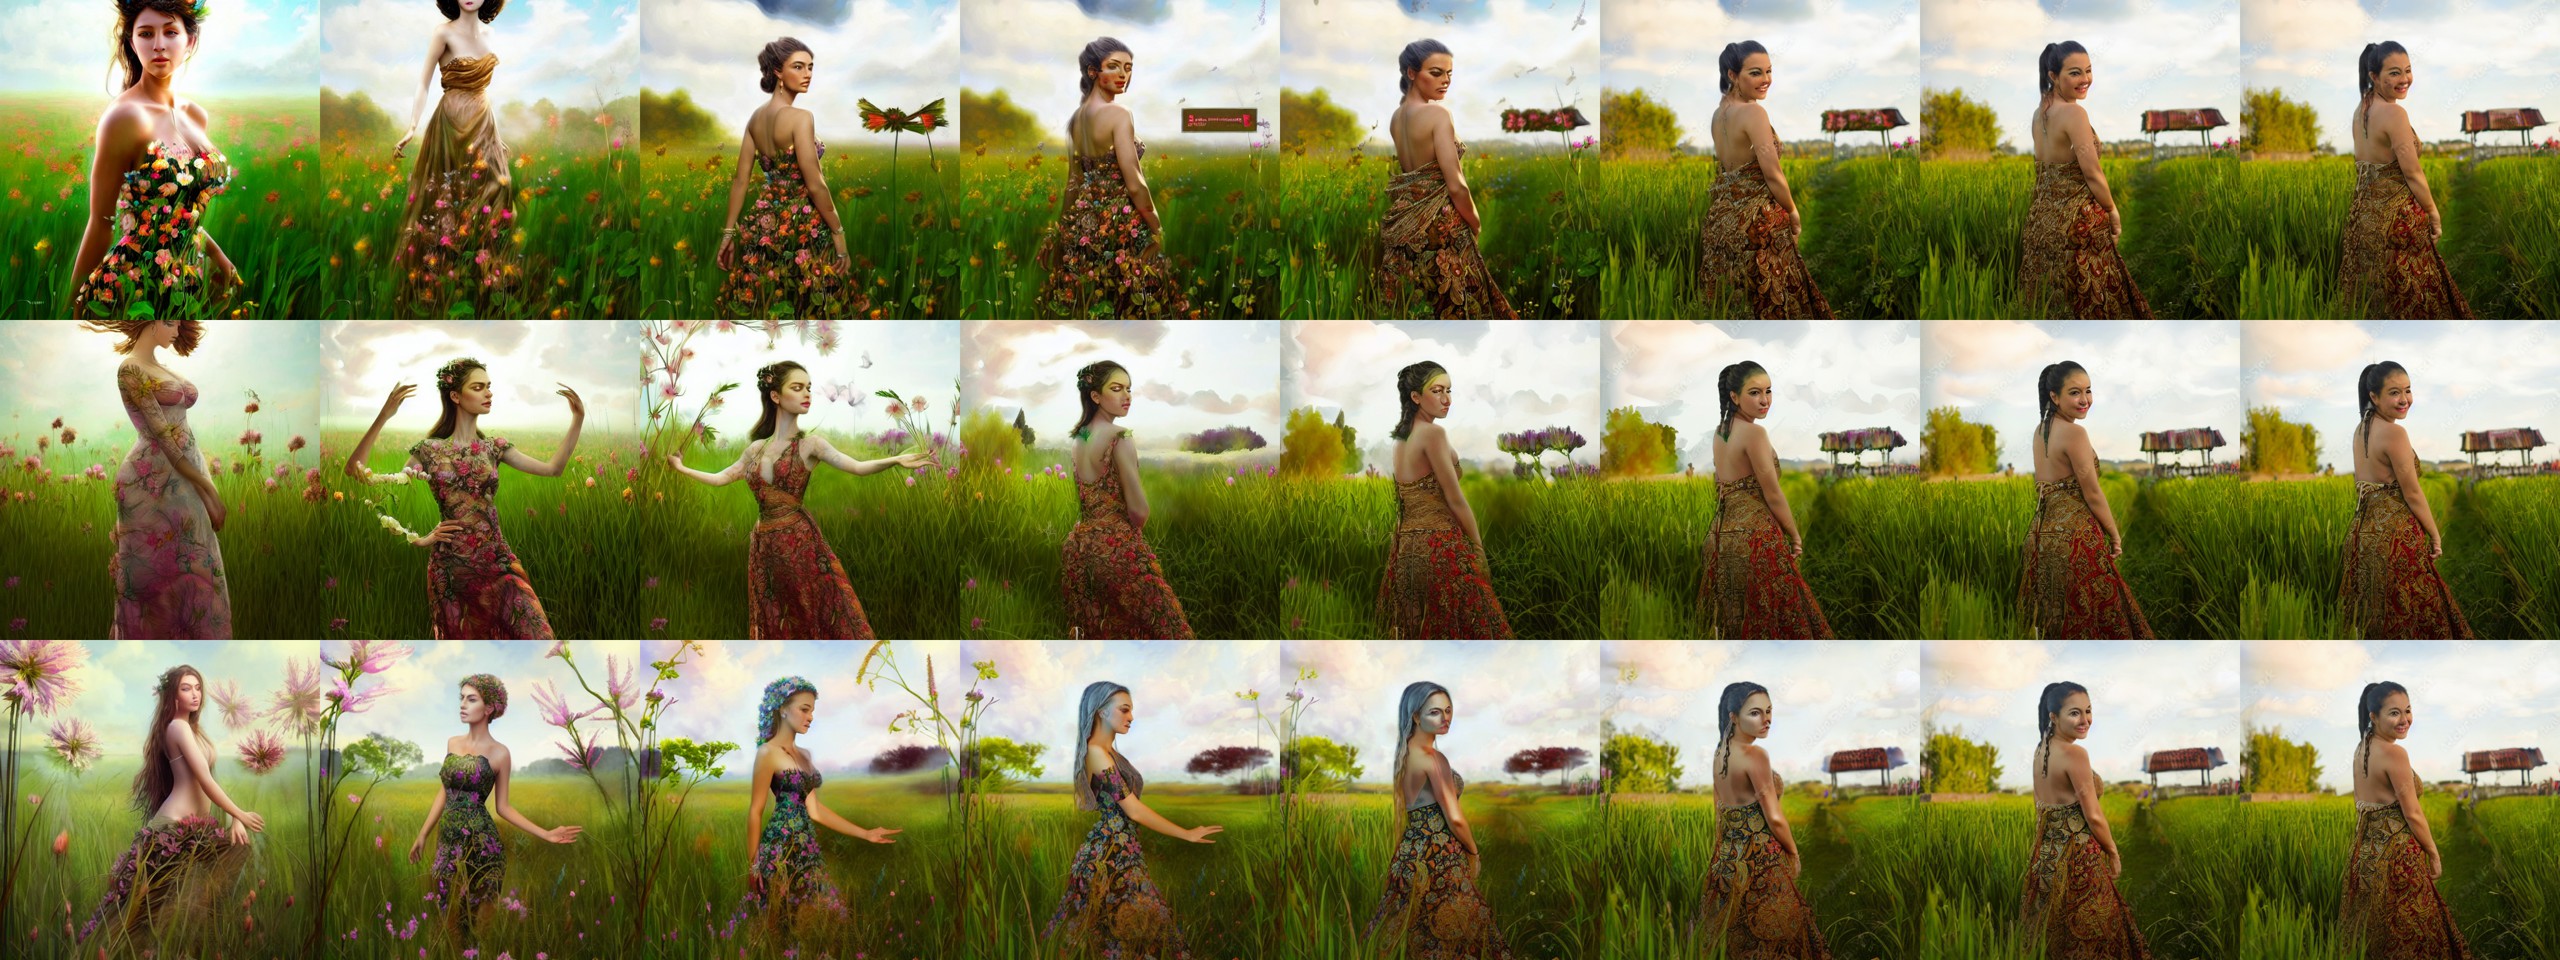
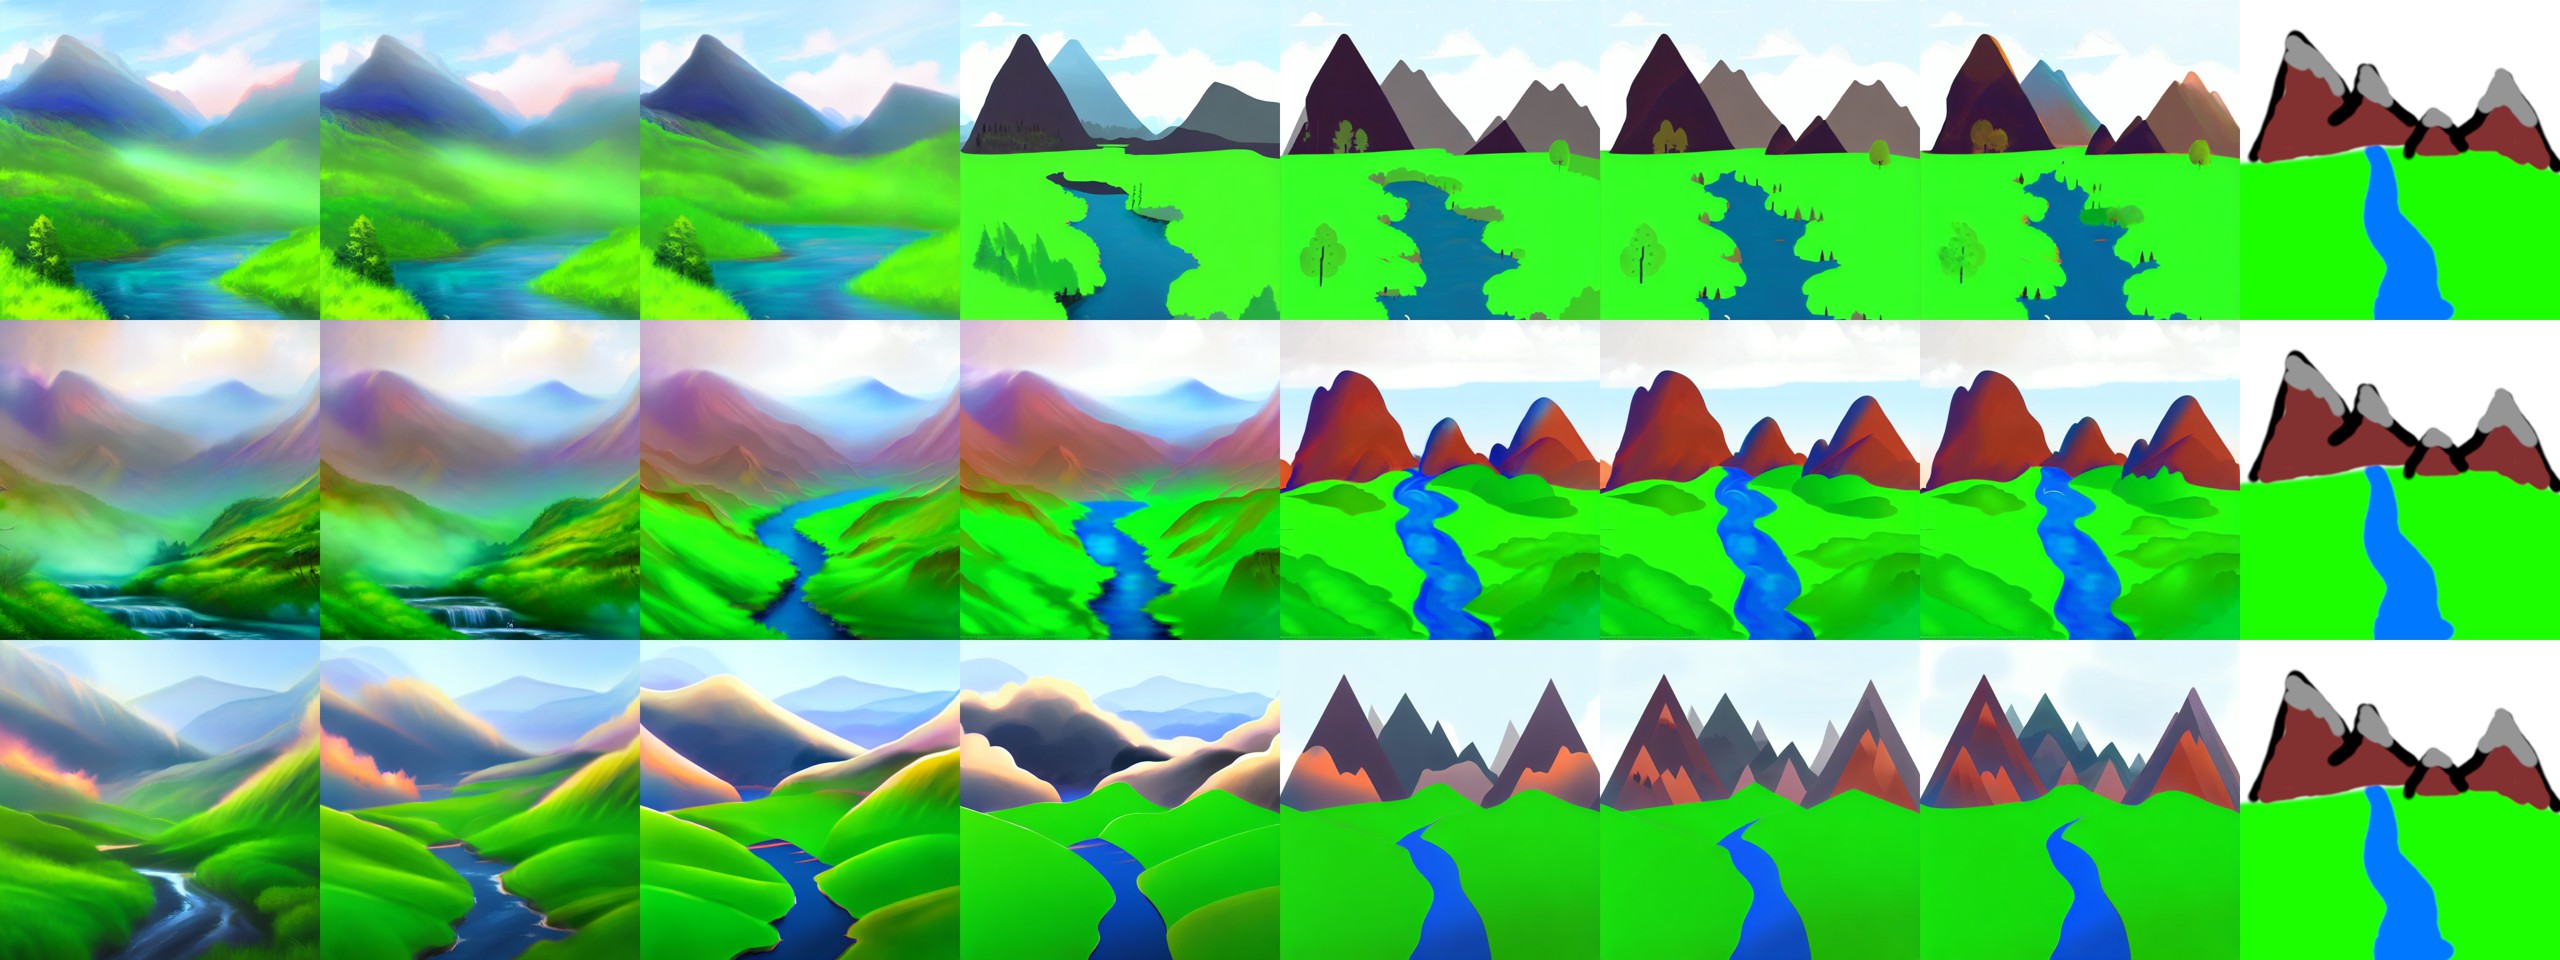
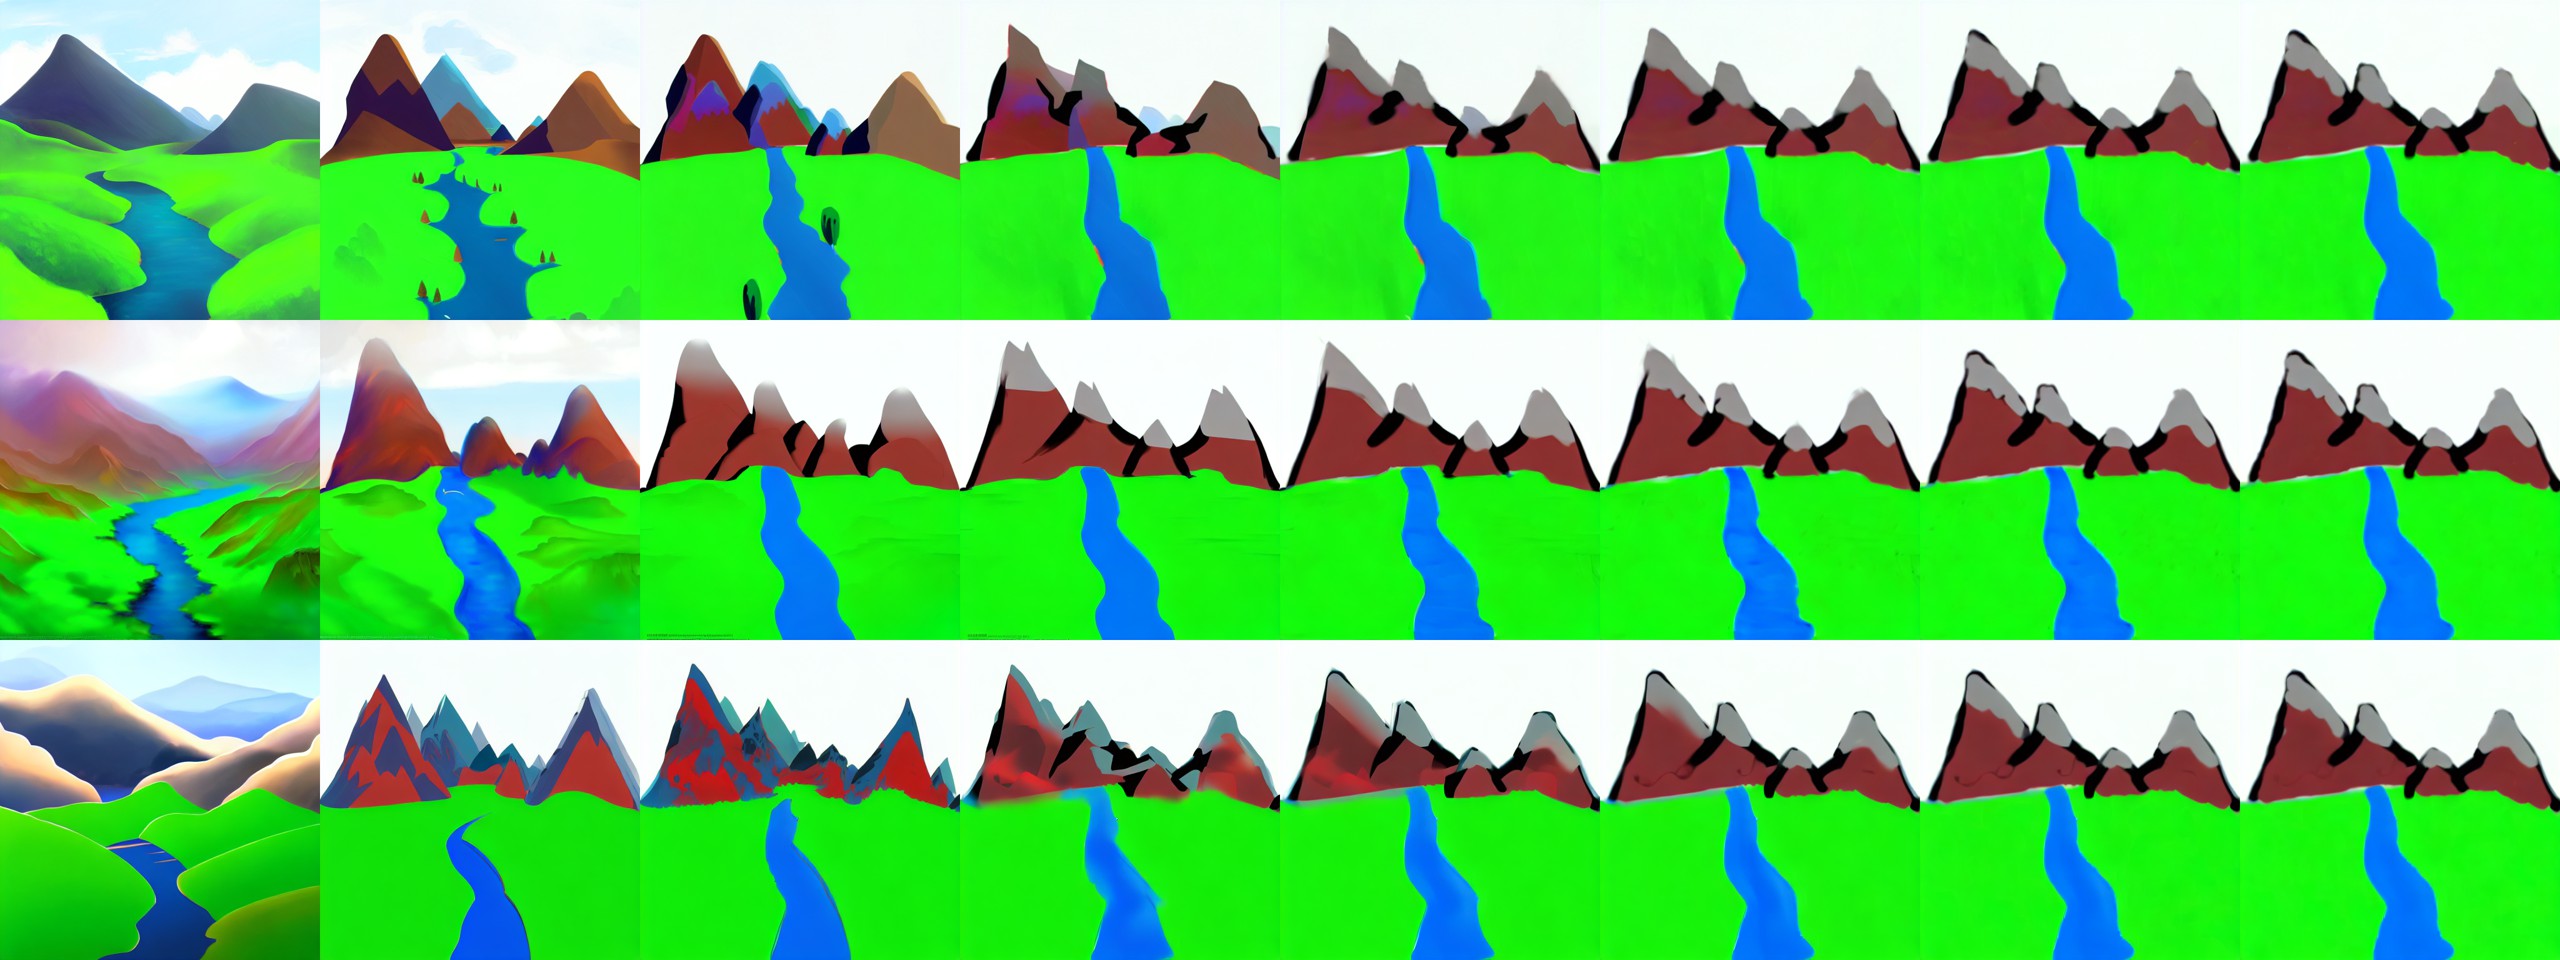
Fiugres 13, 14 ("robot"), 17 and 18 ("mountains") show that one must use very low strengths if the target image is unrealistic, having lots regions with uniform color and lacks small-scale details. Better results could be obtained by running the img2img generation several times, using a low strength value each time and picking the most promising looking image as a starting point for the next iteration.
Other examples show that best results are obtained by using a realistic input image to begin with, if realistic results are desired. But since it is very context-dependent on which strength values produce resonable results, trial-and-error approach seems the easiest one. And one must not forget that CFG scale can be changed as well from the default 7.5, and it will have a major impact on the outcome as well.
There are still many more topics to study, such as what kind of descriptions to append to the prompt, using different versions of the model (version 1.5 is alreayd out), using different samplers among others.
Related blog posts:
|
|
|
|
|
|
|
|
|
|
